Building Linux kernel on the Debian OS (Debian 10 Buster) (Short Edition)

Building Linux kernel on the Debian OS (Debian 10 Buster) (Short Edition).

This blog-post describes (short edition) simple method of the Linux Kernel building on Operational System Linux Debian 10.

  • If current user is root, all next commands (including copy to /usr/srcdpkg -i, … ) can be executed without any additional changes of permissions. In another case, it’s necessary to care about permissions and add sudo before some commands.
  • Some software needs to be installed:
    • apt-get install gcc make git exuberant-ctags bc libssl-dev libelf-dev elfutils fakeroot build-essential zlib1g-dev libncurses5-dev.
  • Download necessary version of the Linux Kernel here: www.kernel.org.
  • Unpack archive here: /usr/src.
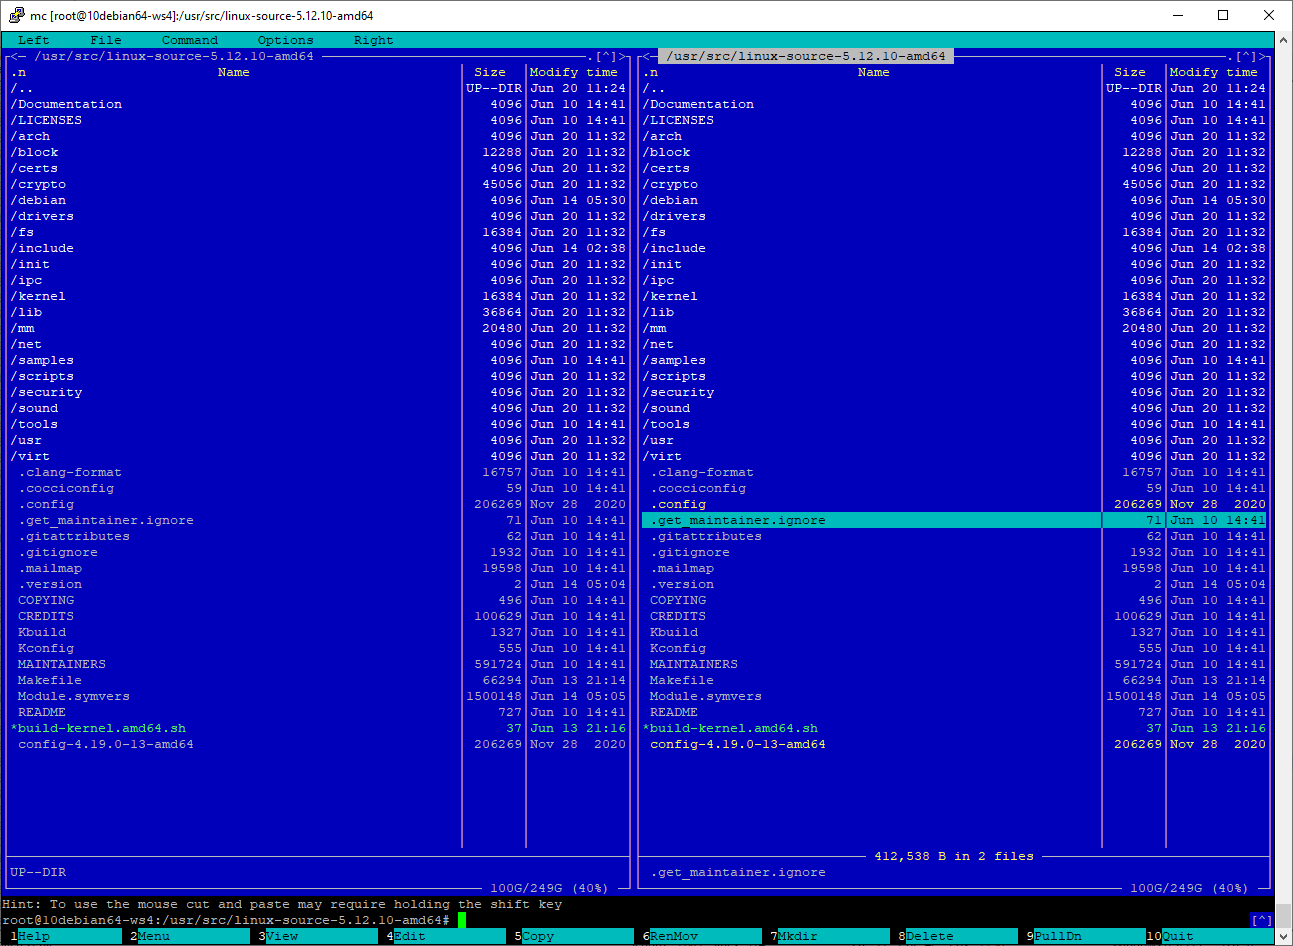
  • Copy current config file of the current kernel from /boot.
    • For example: /boot/config-4.19.0-13-amd64.
  • Create file .config (base config file of the Linux Kernel):
    • cp ./config-4.19.0-13-amd64 ./.config
  • Run:
    • make menuconfig.
  • Configure of just save configuration to the file .config (new options for current version of the Linux Kernel will be added);
  • Then open file (in sources directory): Makefile
    and setup value: EXTRAVERSION (EXTRAVERSION = -amd64).
  • Follow commands can be used for cleaning and build:
    • make clean – cleaning built binaries and temporary files
      or
    • make deb-pkg – full build and binary images creating.
  • For installing built .deb modules, use follow commands:
    • dpkg -i ./linux-*.deb
  • After that, new kernel will be installed to the directories:
    • /boot
    • /usr/lib/modules/5.12.10-amd64
    • /usr/lib/debug/lib/modules/5.12.10-amd64
    • /usr/src

Building Linux kernel on the Debian OS (Debian 10 Buster)

Building Linux kernel on the Debian OS (Debian 10 Buster).

This blog-post describes simple method of the Linux Kernel building on Operational System Linux Debian 10.

At the current moment (when this blog-post is being created) (2021-06), last current version was Debian 10.10.

Current version of the Linux Kernel was 4.19.0-13 (4.19.160).

Follow kernels have been built, using this method:

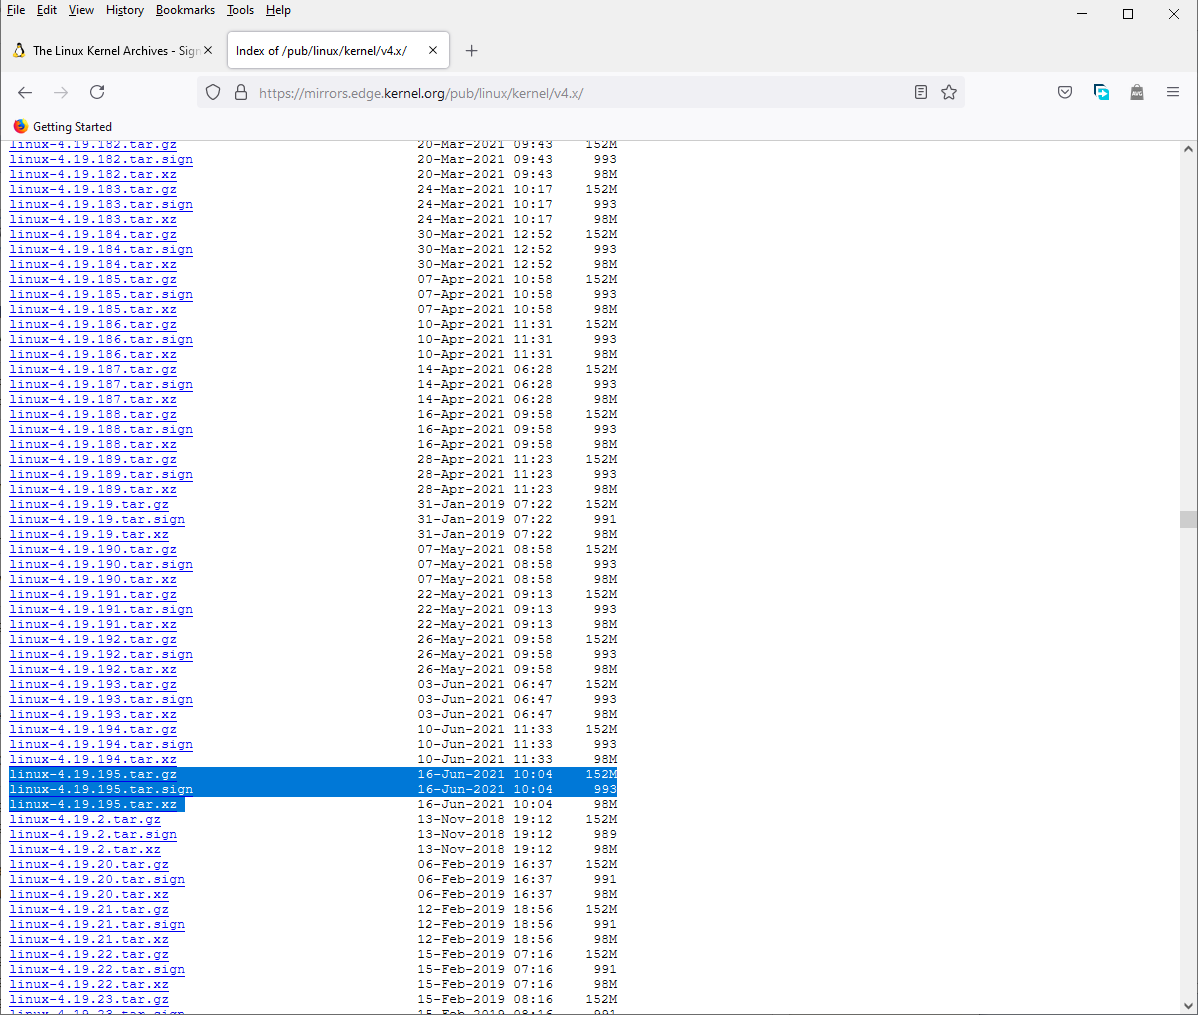
  • Linux Kernel 4.19.194 (release: 2021-06-10)
  • Linux Kernel 5.11.22 (release: 2021-05-19)
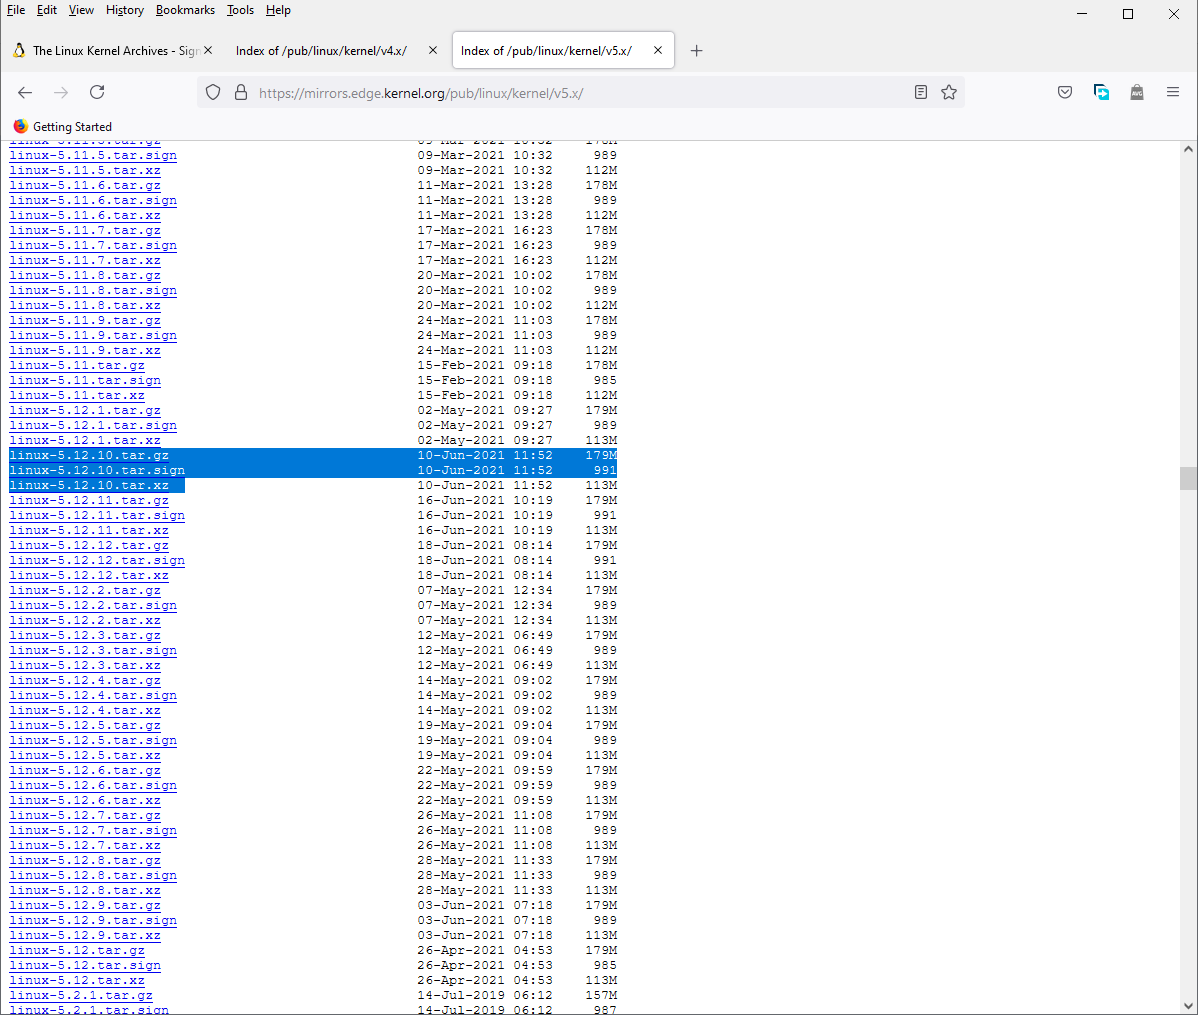
  • Linux Kernel 5.12.10 (release: 2021-06-10)

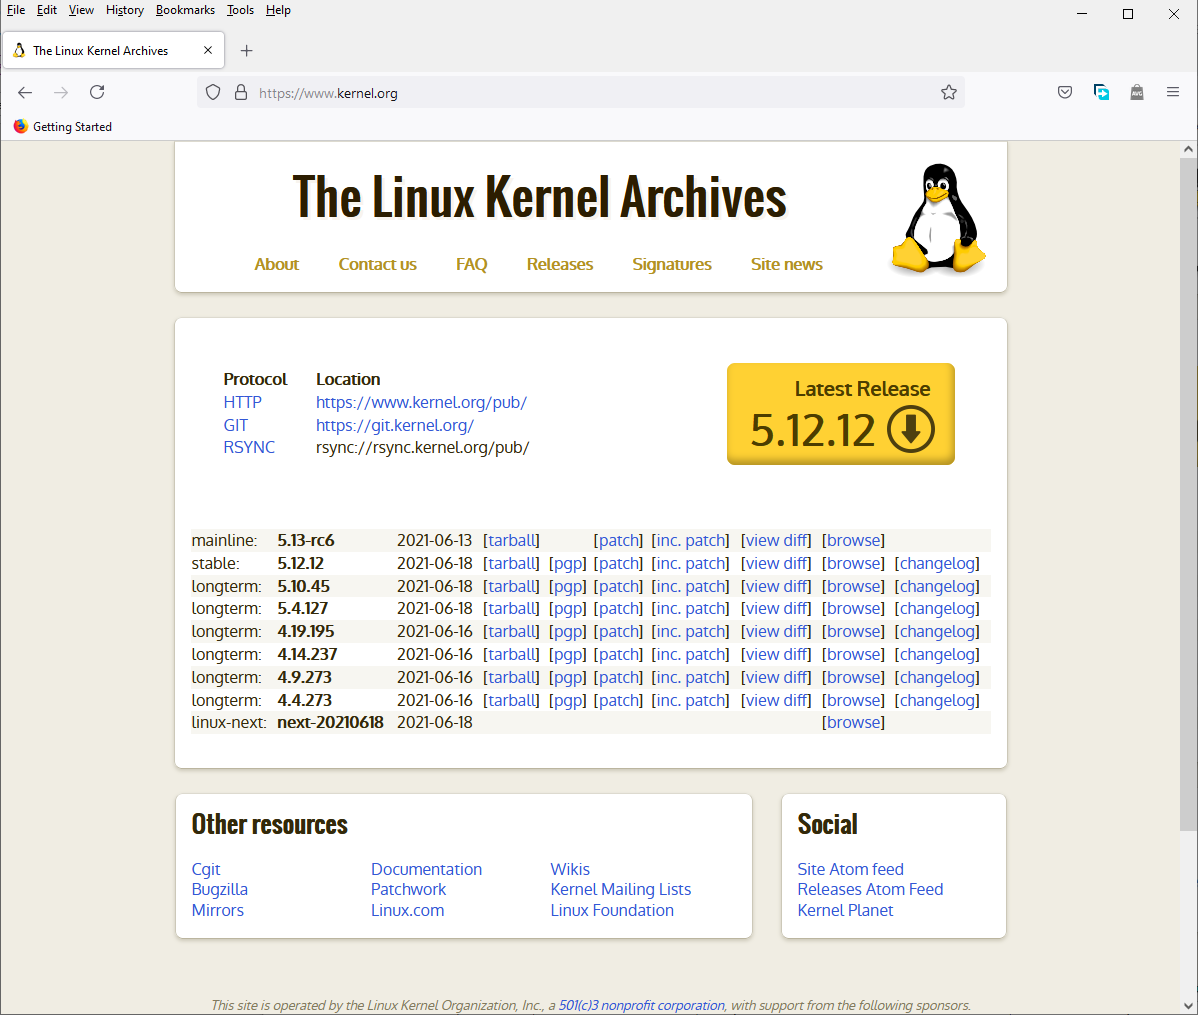
Necessary version of the Linux Kernel could be found here:

linux.kernel.build.scr.01.png

linux.kernel.build.scr.03.png

linux.kernel.build.scr.04.png

There are files .sign, distributed by www.kernel.org, which contain Digital Signature of correspondent files. Digital Signature of correspondent files can be verified, using methods, described here: Signatures. The verification allows to check if downloaded files correspondent original release versions and haven’t been changed.

linux.kernel.build.scr.02.png

Building the Linux Kernel on the Linux Debian 10 OS:

  • If current user is root, all next commands (including copy to /usr/srcdpkg -i, update-grub2, … ) can be executed without any additional changes of permissions. In another case, it’s necessary to care about permissions and add sudo before some commands.
  • Download necessary version of the Linux Kernel.
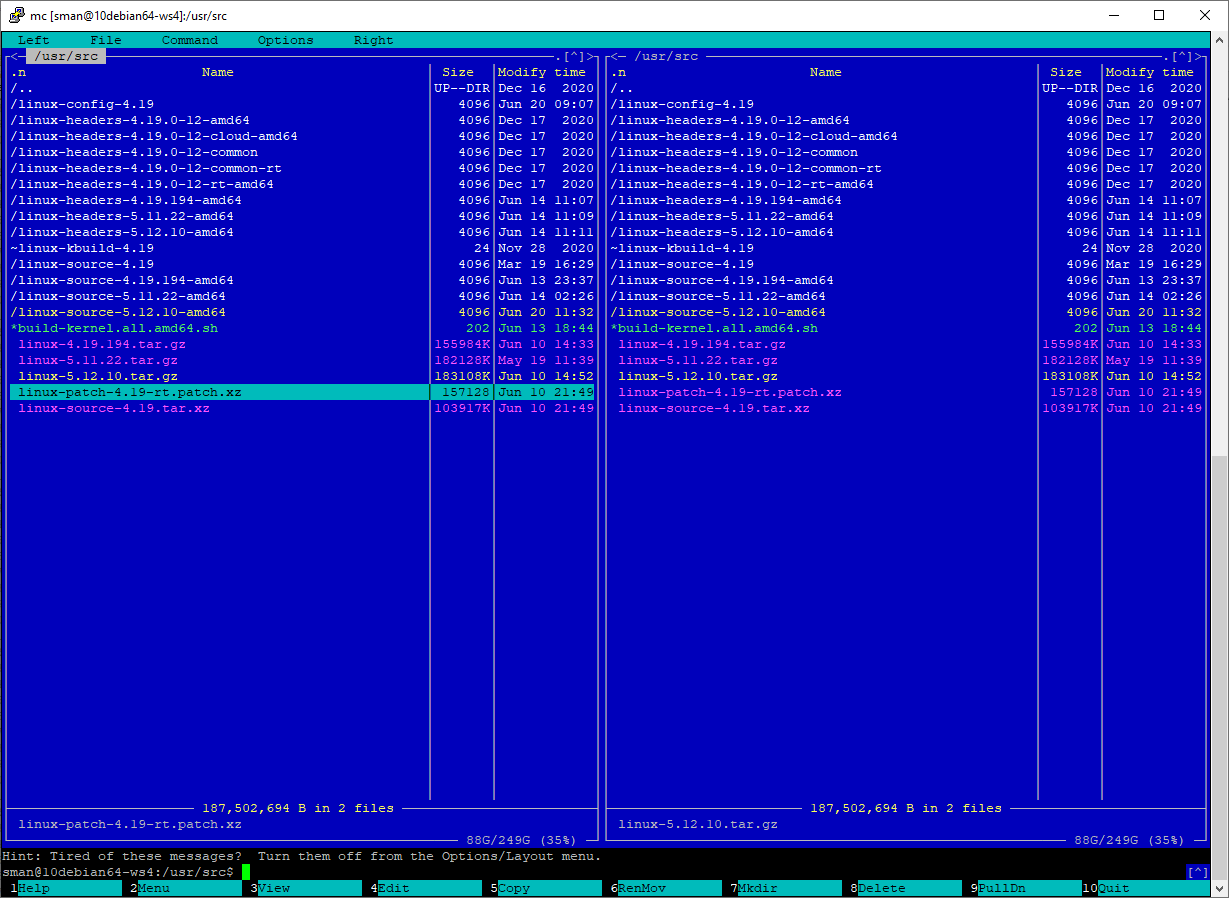
  • Copy kernel archive to the directory: /usr/src.
  • Unpack archive:
    • if extension of the archive is .tar.gz:
      1. tar -zxf ./[Linux Kernel Sources].tar.gz
      2. For example: tar -zxf ./linux-5.12.10.tar.gz
    • if extension of the archive is .tar.xz:
      1. tar -Jxf ./[Linux Kernel Sources].tar.xz
      2. For example: tar -Jxf ./linux-5.12.10.tar.xz

Directory ./linux-5.12.10 will be created, that contains sources of the Linux Kernel (version 5.12.10).

  • Unpacked directory can be renamed from ./linux-5.12.10 to ./linux-source-5.12.10-amd64 , where ‘amd64‘ – target build platform:
    • mv ./linux-5.12.10 ./linux-source-5.12.10-amd64.

linux.kernel.build.scr.05.png

  • Some software needs to be installed:
    • apt-get install gcc make git exuberant-ctags bc libssl-dev libelf-dev elfutils fakeroot build-essential zlib1g-dev libncurses5-dev.
  • Run follow command:
    • cd /boot.

This directory (/boot) contains installed Linux kernels and suite of config files, which have been used during building installed kernels. For example:

  • Linux Kernel 4.19.0-13 (4.19.160) :
    •  /boot/vmlinuz-4.19.0-13-amd64
  • Config of the Linux Kernel 4.19.0-13 (4.19.160) :
    • /boot/config-4.19.0-13-amd64.
  • Copy this file: /boot/config-4.19.0-13-amd64 to unpacked directory  (sources): /usr/src/linux-source-5.12.10-amd64.
  • Make one more copy of the file: /usr/src/linux-source-5.12.10-amd64.
    • For example:
      cd /usr/src/linux-source-5.12.10-amd64
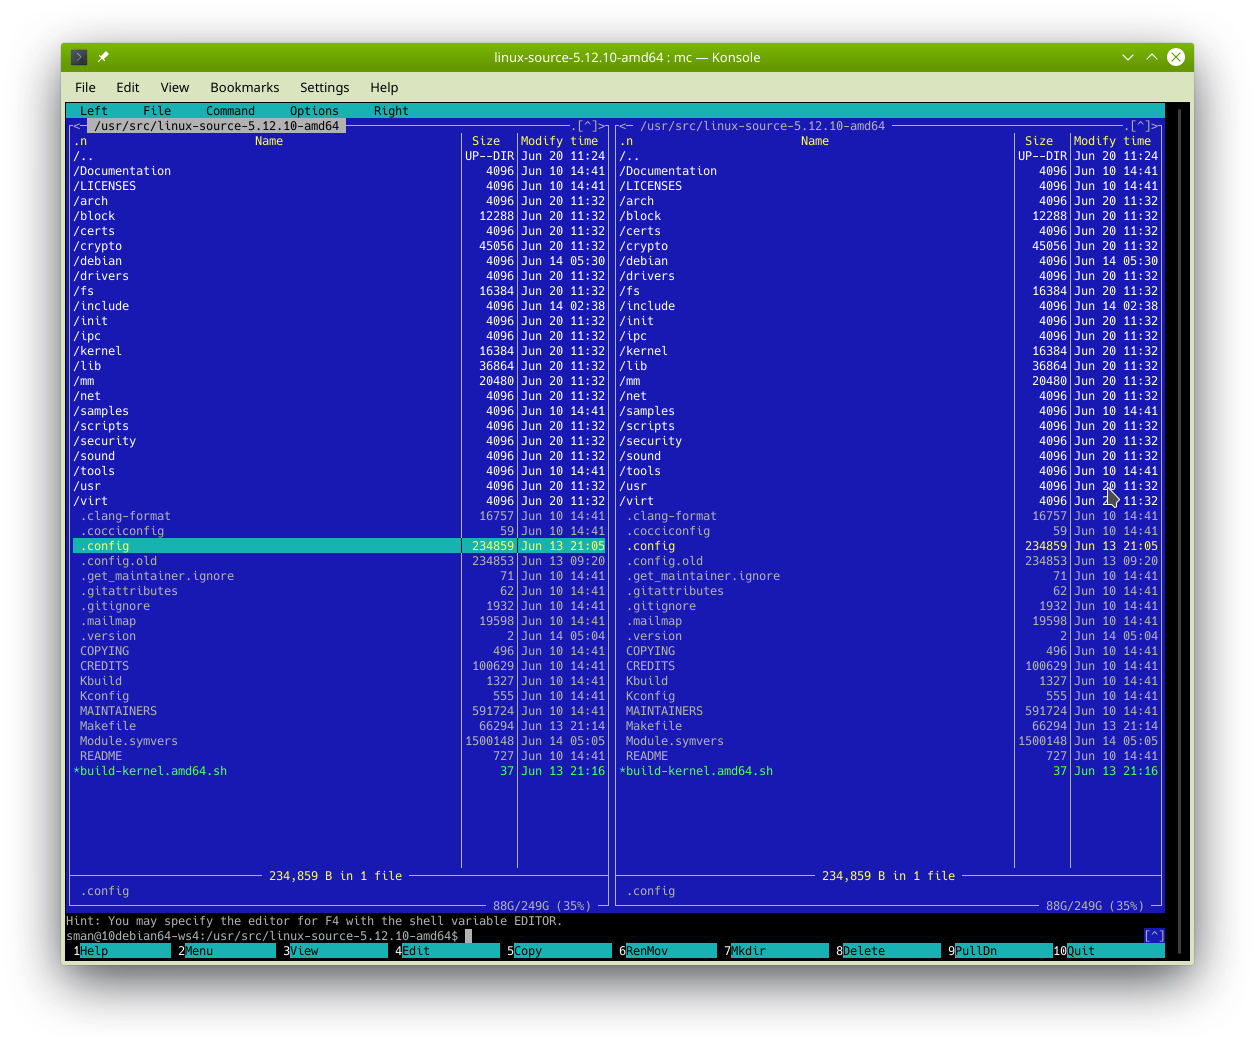
      cp ./config-4.19.0-13-amd64 ./.config.

linux.kernel.build.scr.06.png

  • Run
    • cd /usr/src/linux-source-5.12.10-amd64
  • and one of the following commands:
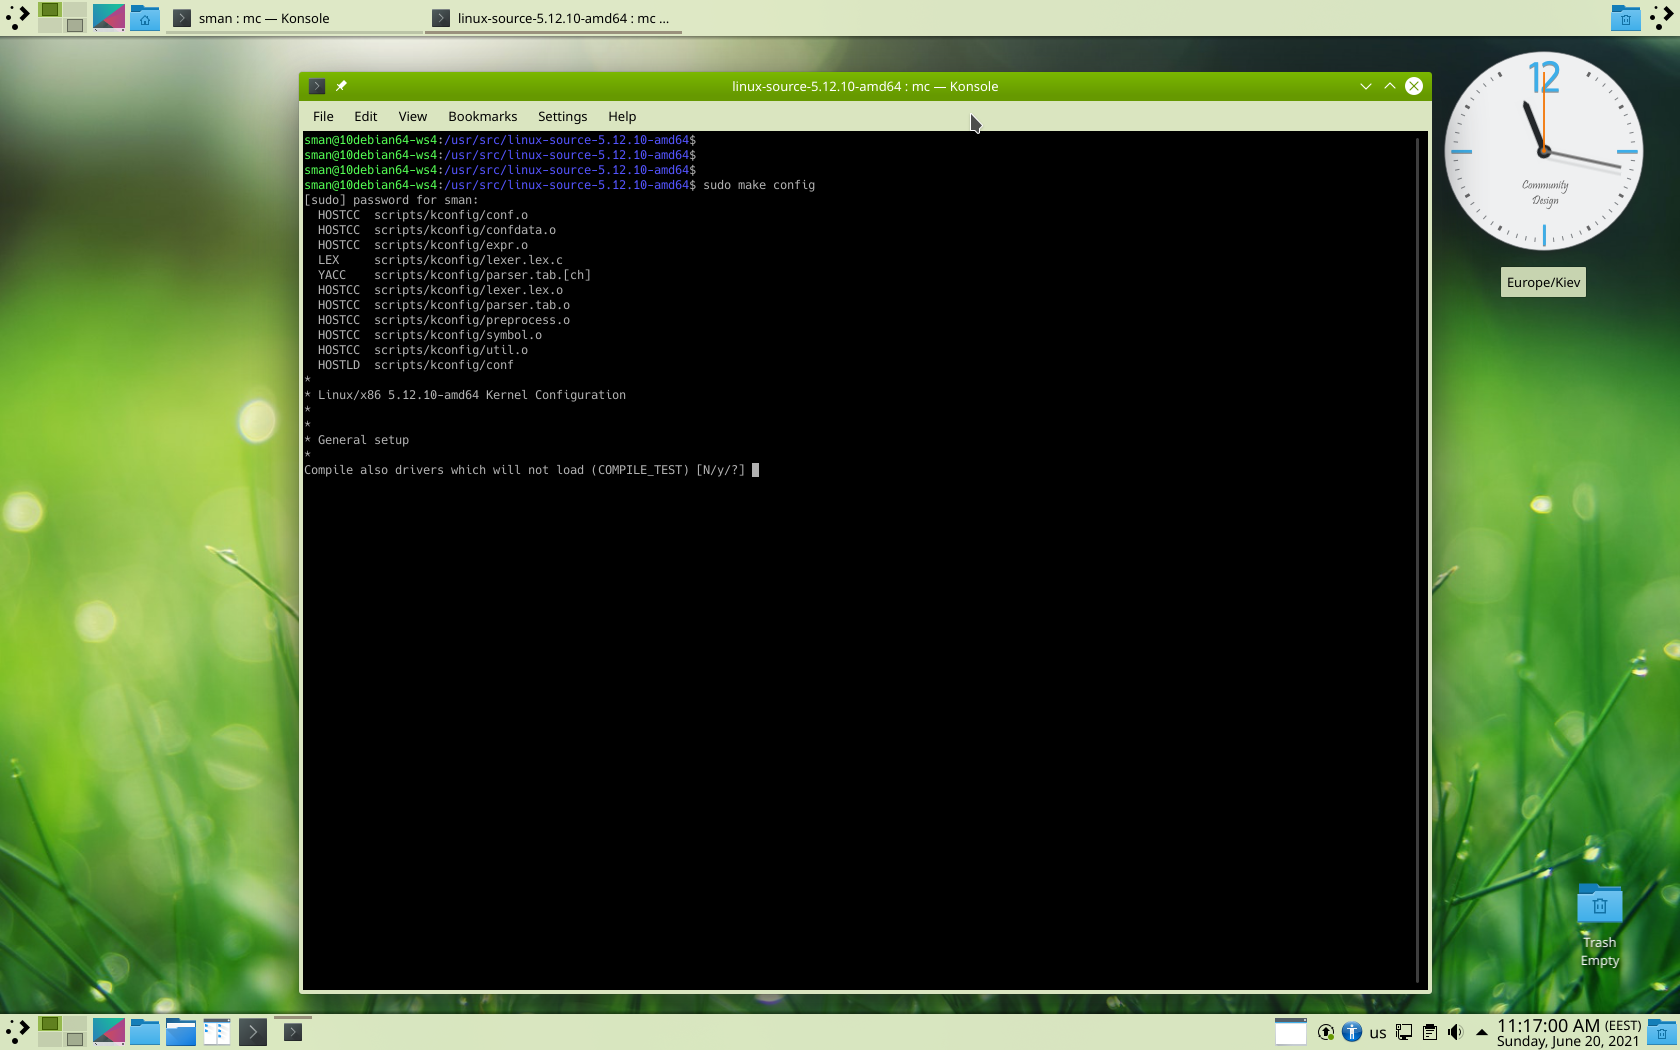
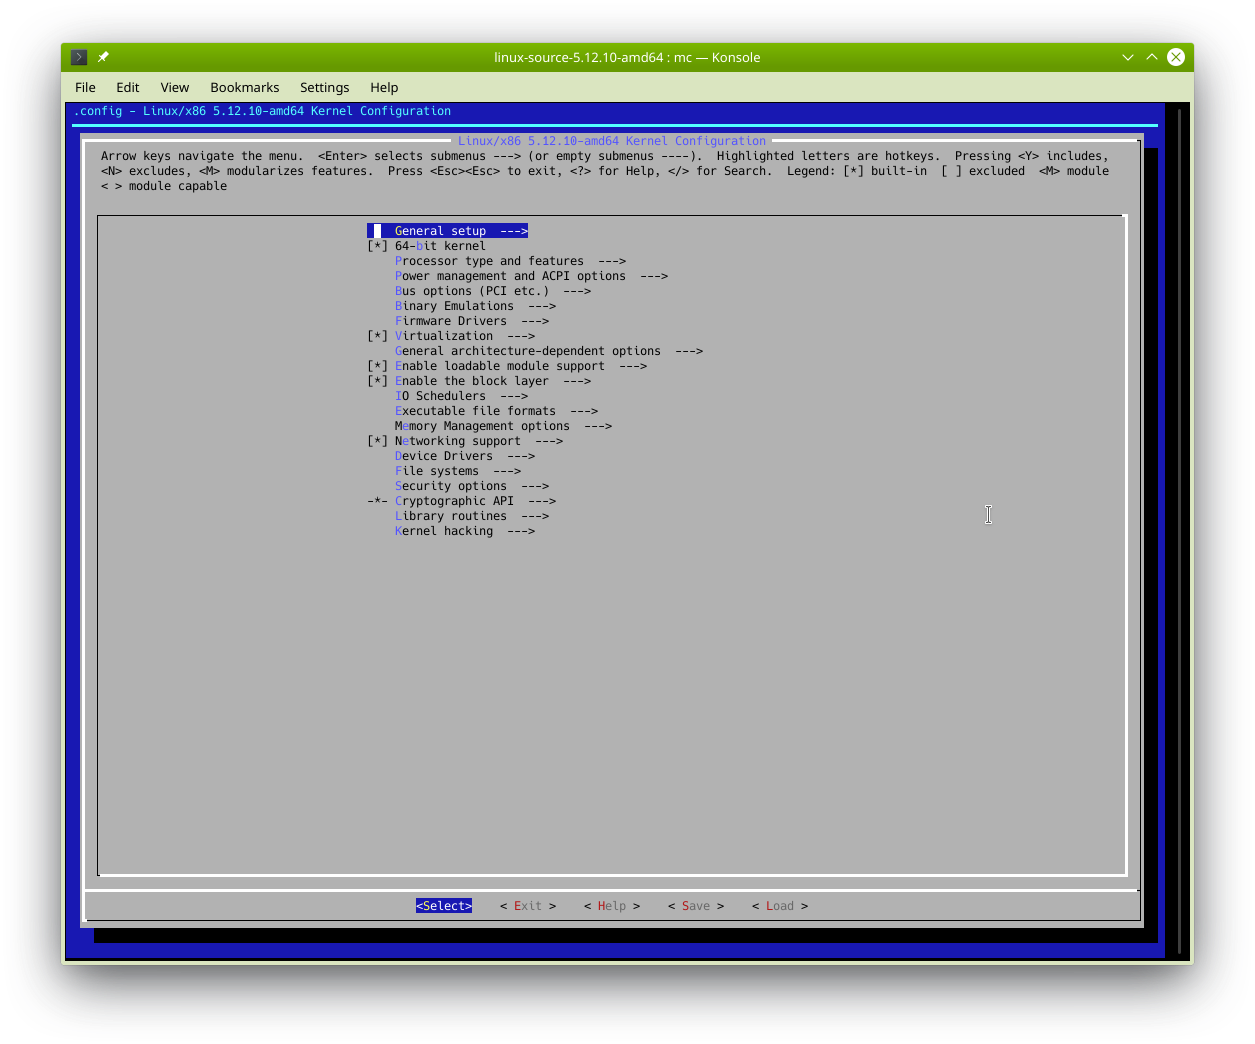
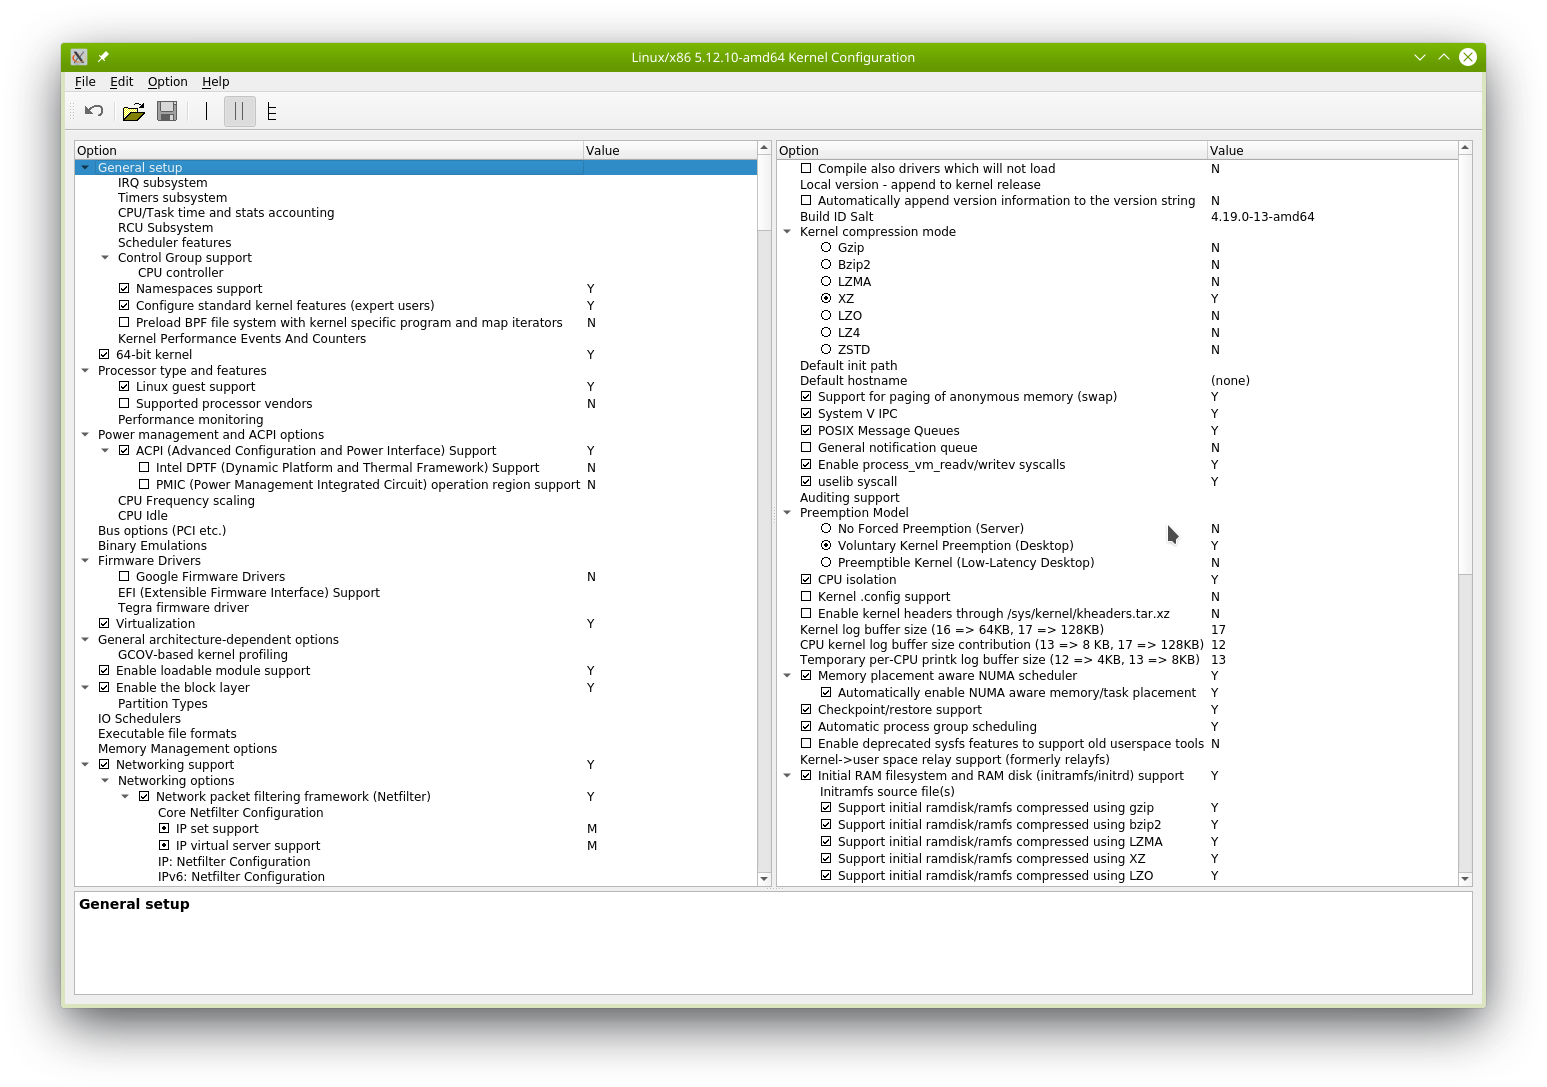
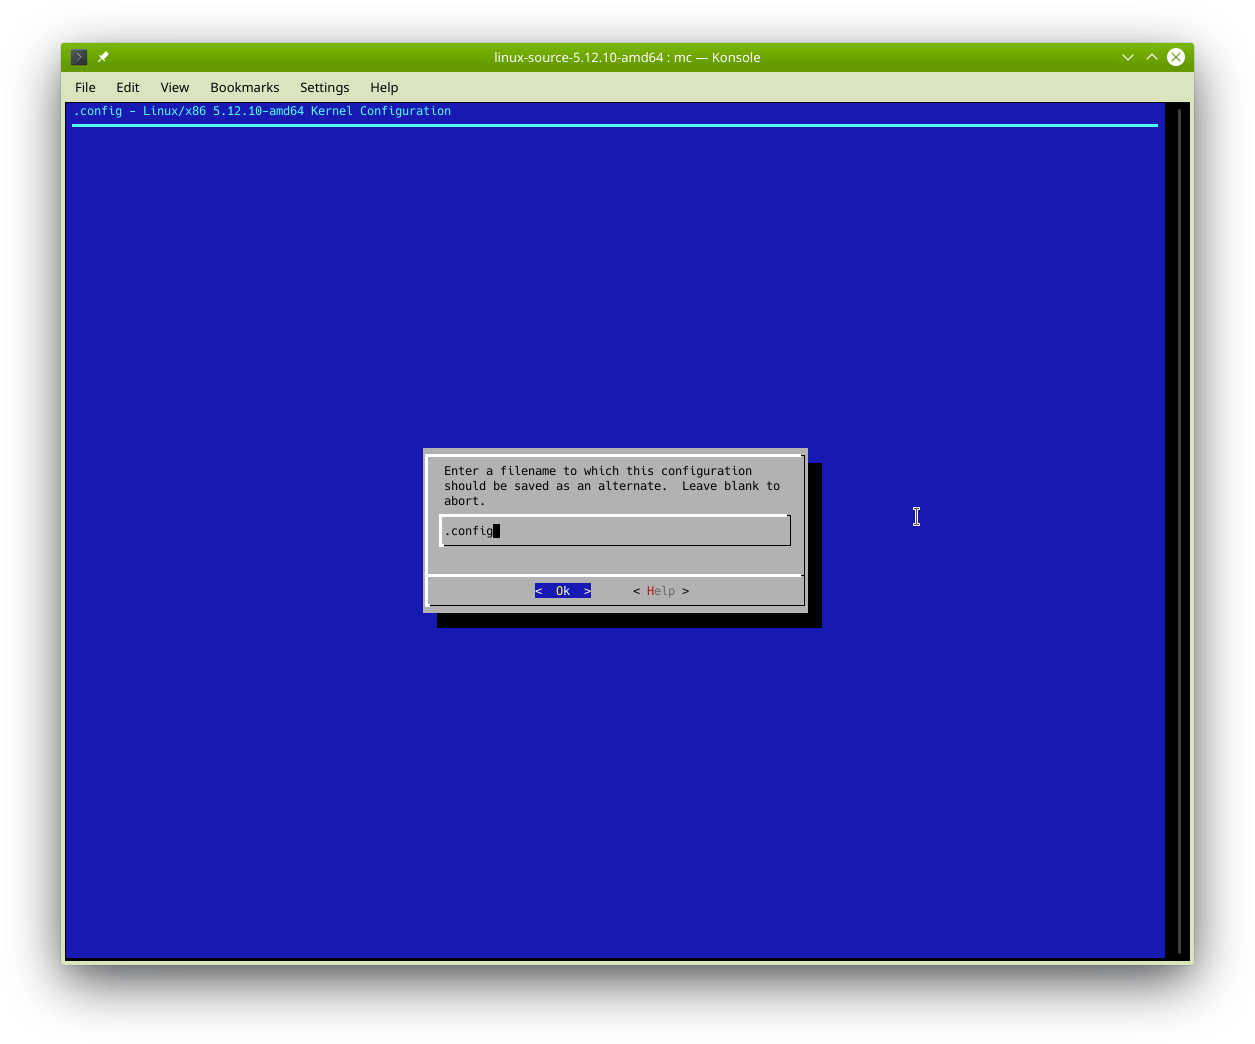
    • make config – text mode (questions)
    • make menuconfig – text mode (menu)
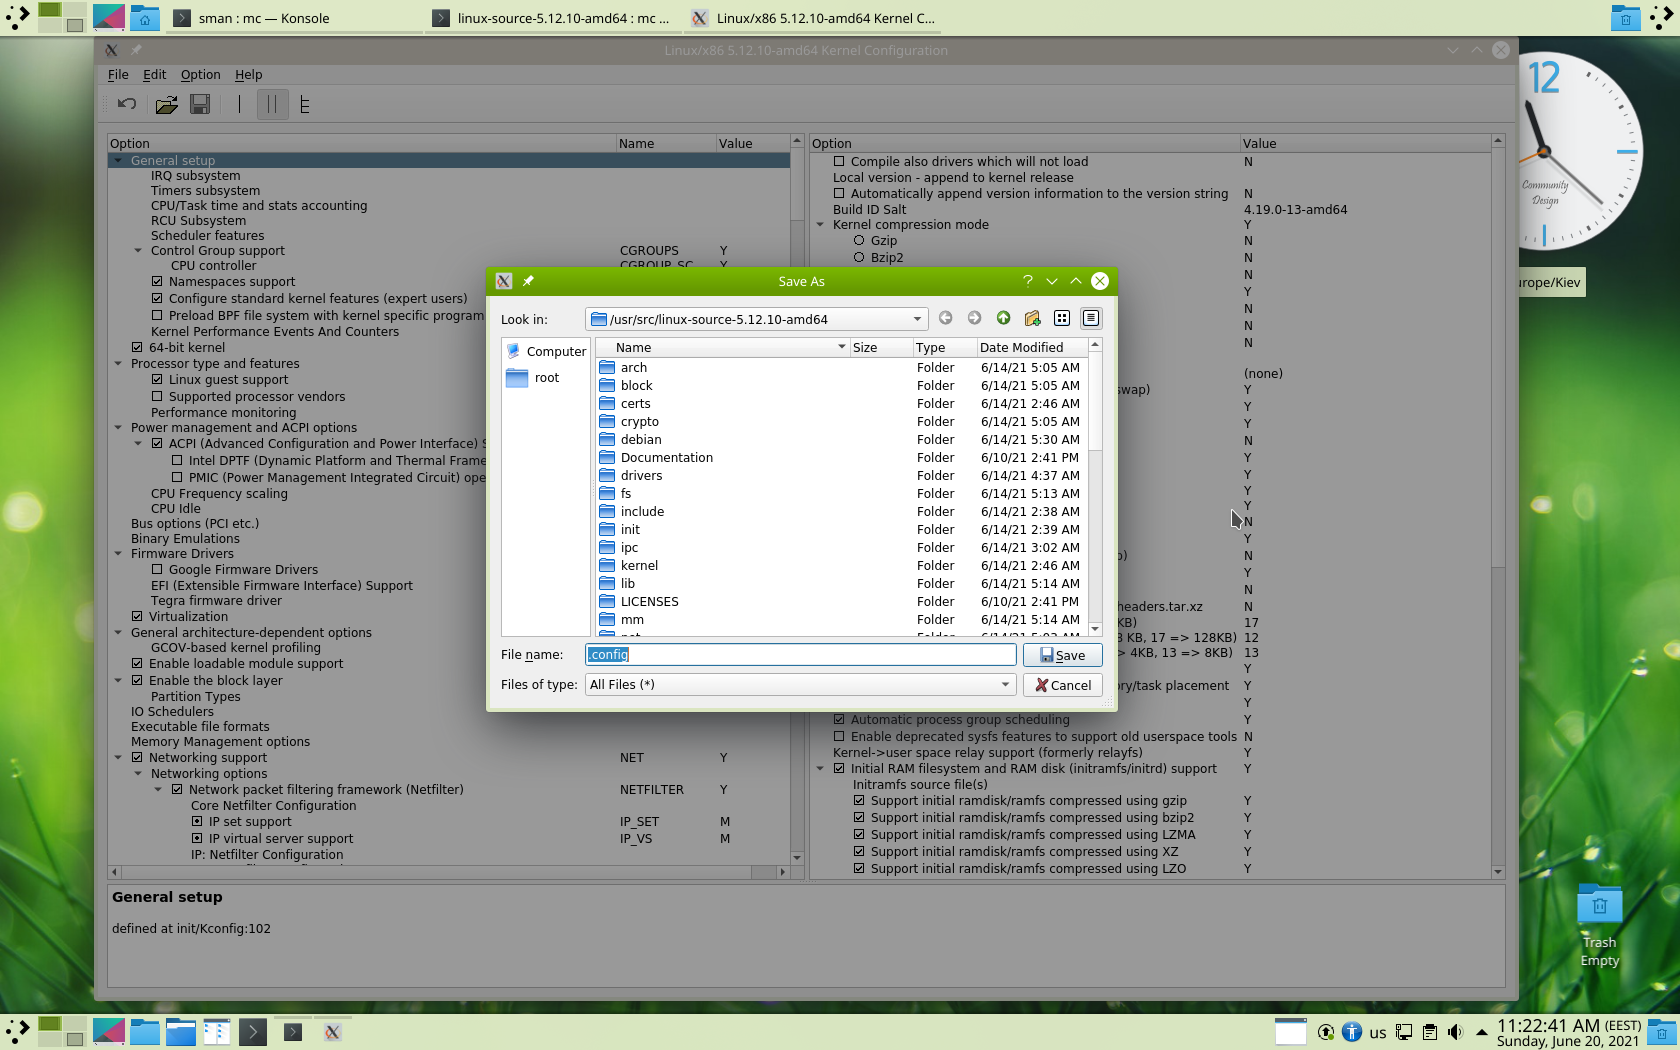
    • make xconfig – graphical mode (menu)

linux.kernel.build.scr.07.png
linux.kernel.build.scr.08.png
linux.kernel.build.scr.09.png

  • All menu options can be configured, but it’s necessary to save current configuration to file:
    /usr/src/linux-source-5.12.10-amd64/.config.

linux.kernel.build.scr.10.png
linux.kernel.build.scr.11.png

  • Script saves default values of all non-configured menu options.
    • I.e. the most quick way of configuring:
    • just:
      • make menuconfig
    • and save configuration to the file
      • ./.config.

linux.kernel.build.scr.12.png

  • Then open file:
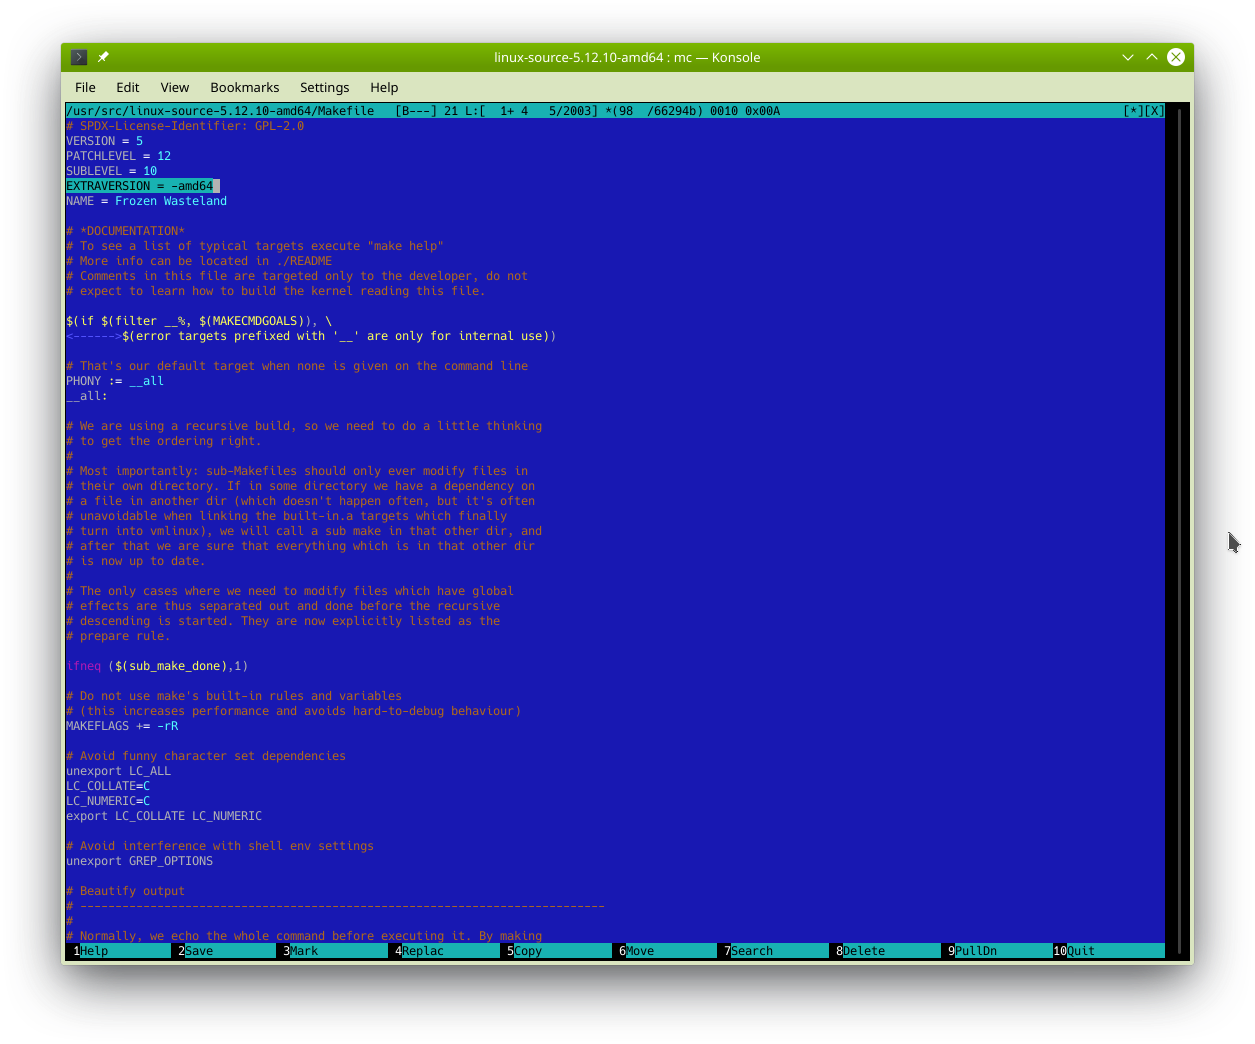
    /usr/src/linux-source-5.12.10-amd64/Makefile
    and setup value: EXTRAVERSION.

    • For example:
      • EXTRAVERSION = -amd64

linux.kernel.build.scr.13.png

  • Follow commands can be used for cleaning and build:
    • make clean – cleaning built binaries and temporary files
      or
    • make deb-pkg – full build and binary images creating.
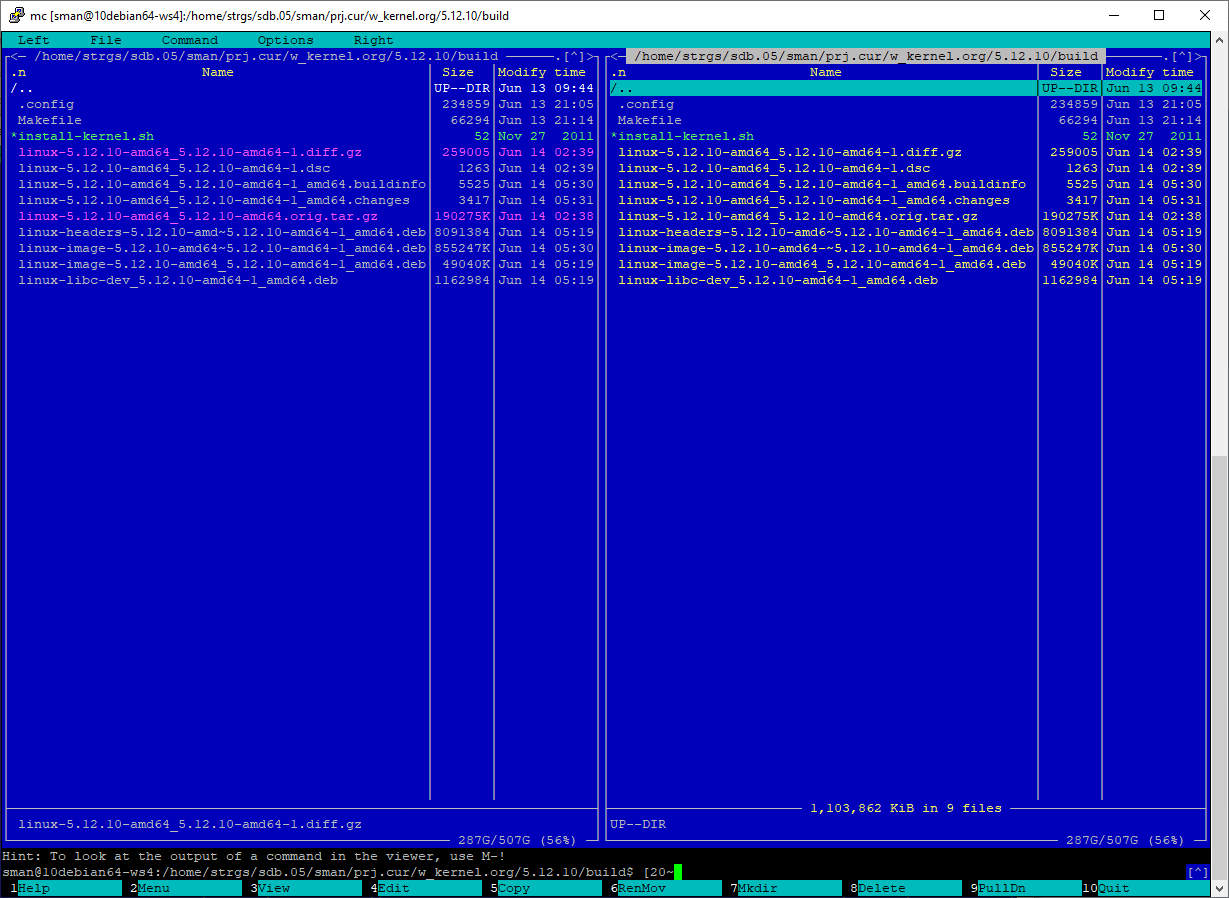
  • After finishing the build follow files will be created in the current directory
    /usr/src/linux-source-5.12.10-amd64/ :

linux-5.12.10-amd64_5.12.10-amd64-1.dsc
linux-5.12.10-amd64_5.12.10-amd64-1_amd64.buildinfo
linux-5.12.10-amd64_5.12.10-amd64-1_amd64.changes
linux-5.12.10-amd64_5.12.10-amd64.orig.tar.gz
linux-5.12.10-amd64_5.12.10-amd64-1.diff.gz

linux-headers-5.12.10-amd64_5.12.10-amd64-1_amd64.deb
linux-image-5.12.10-amd64_5.12.10-amd64-1_amd64.deb
linux-image-5.12.10-amd64-dbg_5.12.10-amd64-1_amd64.deb
linux-libc-dev_5.12.10-amd64-1_amd64.deb

linux.kernel.build.scr.14.png

  • For installing built .deb modules, use follow commands:
    • cd /usr/src/linux-source-5.12.10-amd64
    • dpkg -i ./linux-*.deb
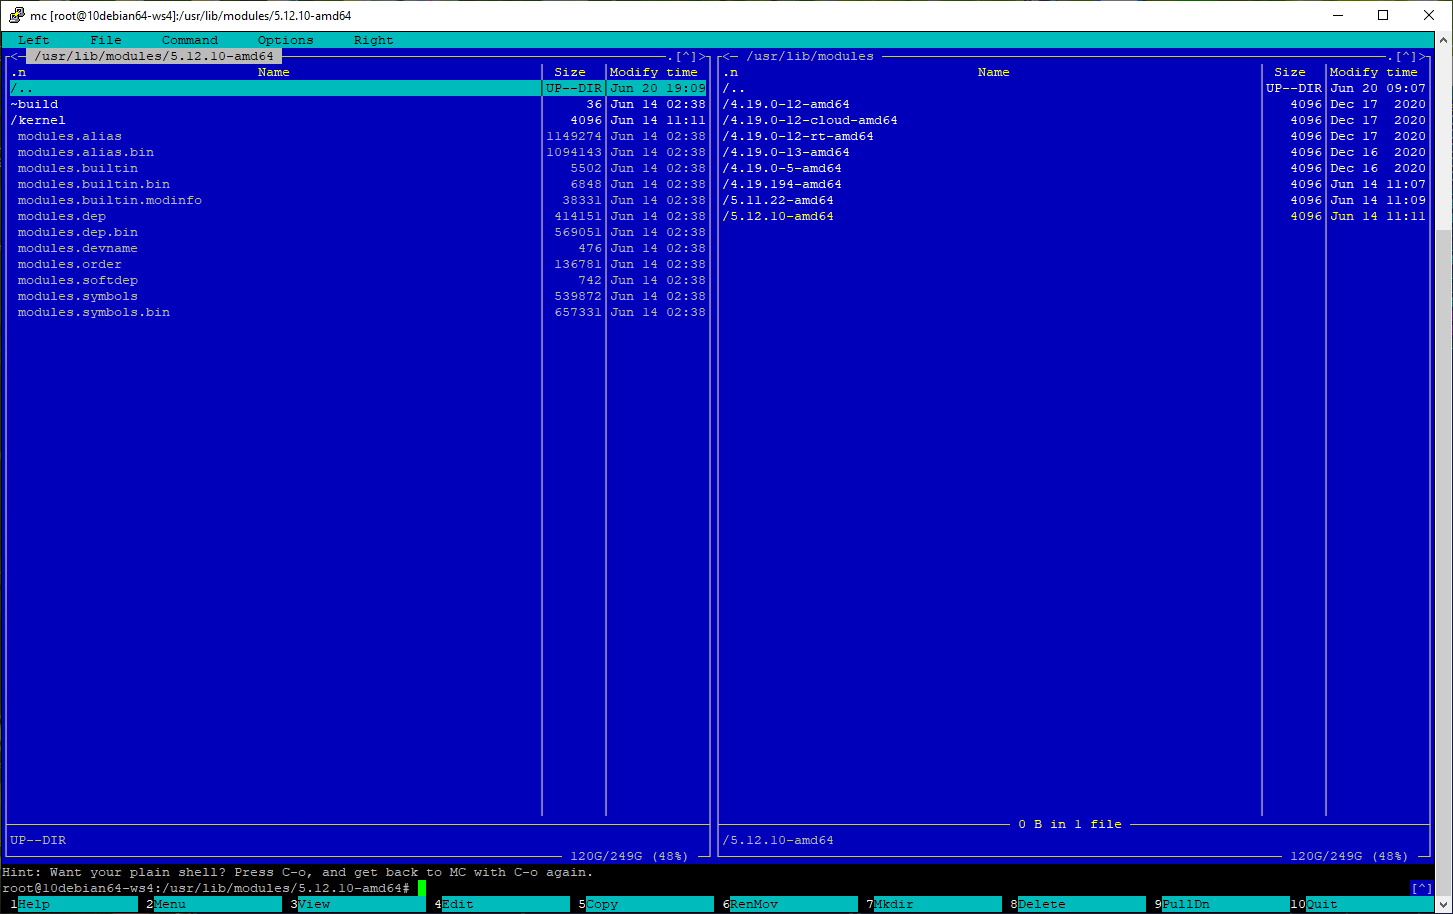
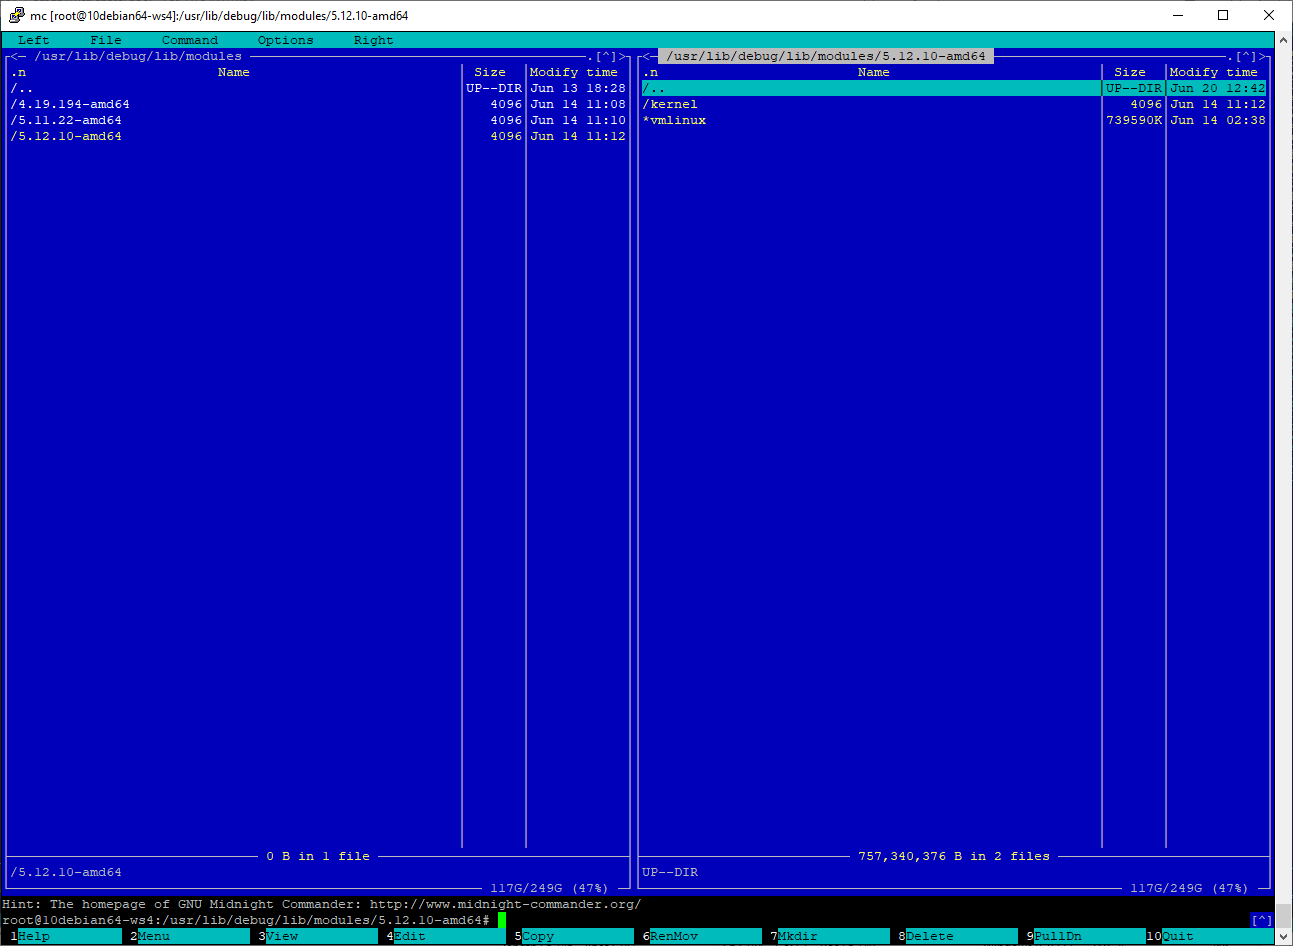
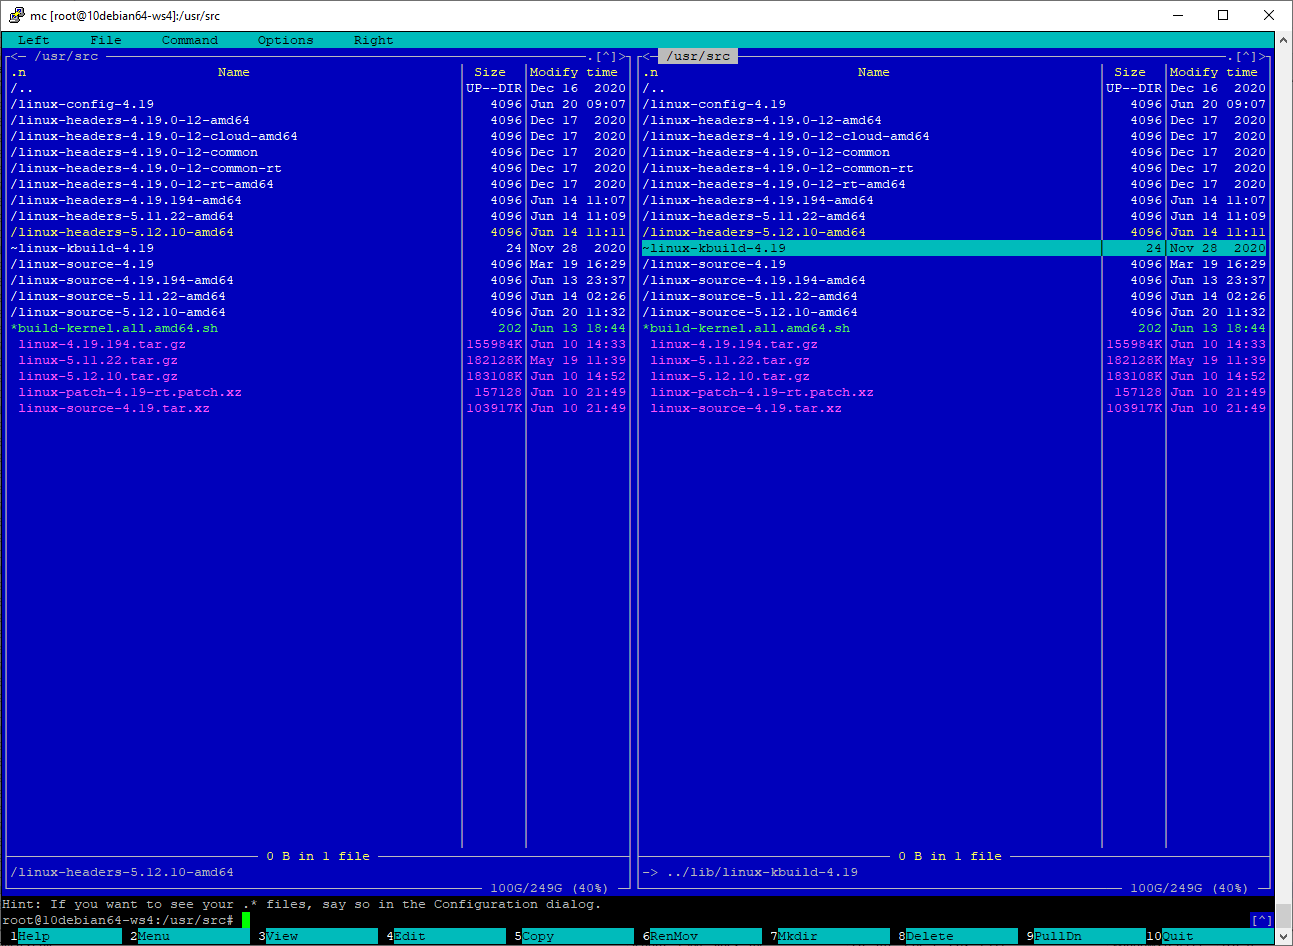
  • After that, new kernel will be installed to the directories:
    • /boot
    • /usr/lib/modules/5.12.10-amd64
    • /usr/lib/debug/lib/modules/5.12.10-amd64
    • /usr/src

linux.kernel.build.scr.15.png
linux.kernel.build.scr.20.png
linux.kernel.build.scr.17.png
linux.kernel.build.scr.16.png

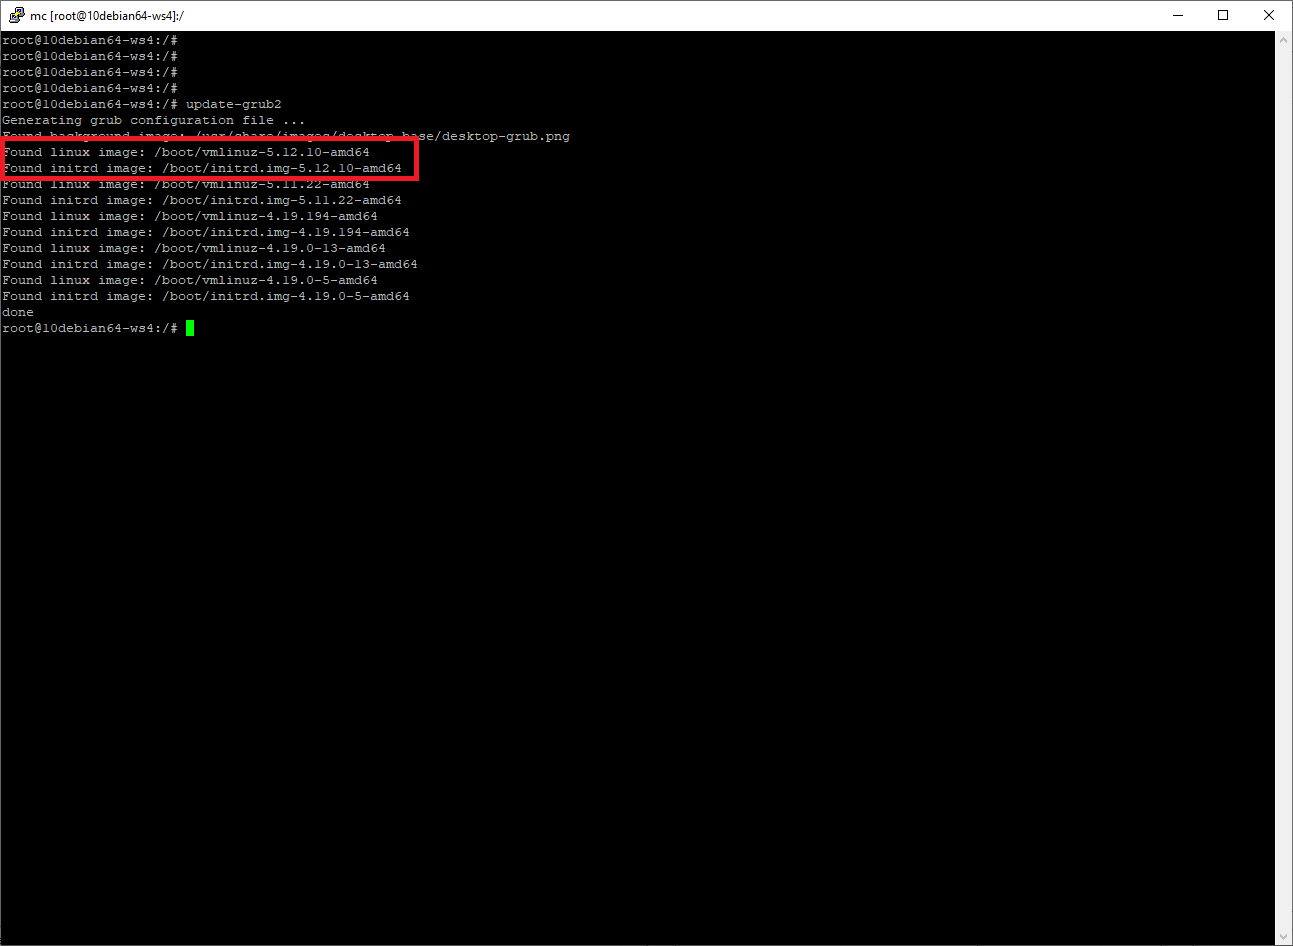
  • If grab2 is installed as boot loader package, follow command should be executed:
    • update-grub2
  • that provides configuring the file:
    • /boot/grub/grub.cfg

linux.kernel.build.scr.18.png
This execution (update-grub2) is optional, as during running “dpkg -i ./linux-*.deb“, updating the /boot/grub/grub.cfg is provided by default.

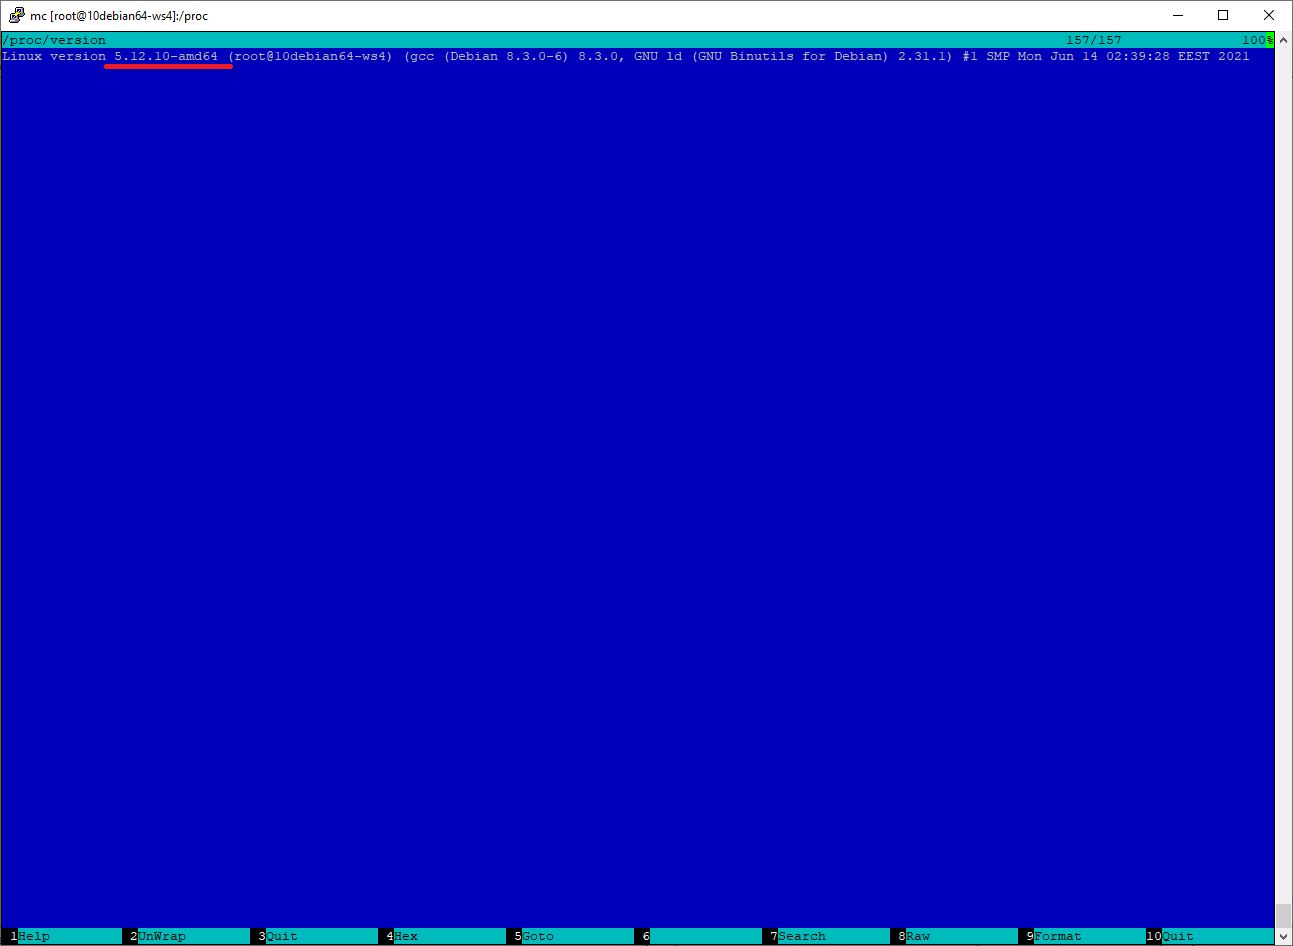
  • After reboot, new version of the kernel will be loaded:
    • file: /proc/version

linux.kernel.build.scr.19.png

Open-source Android VPN Stack Suite 0.0.1.1

Open-source Android VPN Stack Suite 0.0.1.1 has been released.

Supported platforms:

  • Android (sdk >= 26)
  • Examples (demo files, result files, log files), screenshots:
    Examples

Verification of downloaded files:
—————-

GPG Public Key (SManSoft ECDSA Key) <info@smansoft.com> has been published here: http://smansoft.com/gpg/smansoft.pub.asc.
Android VPN Stack Suite – 0.0.1.1 contains suite of [some_install_file].asc files.
Please, use:
gpg --import ./smansoft.pub.asc
for importing of key and
gpg --verify ./[some_install_file].asc ./[some_install_file]
or
gpg --verify ./[some_install_file].asc
for verification of files, published on this site.
Public GPG ECDSA Key can be imported, using
gpg --keyserver hkp://pgp.mit.edu --recv-keys A408B0FCFD774649
too.

Features of the Android VPN Stack Suite:

  • Simple TCP/UDP socket server (with multi-thread support) (Linux platform), that implements open simple communication protocol (application level):
    • TCP:
      • The Client connects to the TCP Server;
      • The Client sends “socket_client: Hello” to the Server;
      • The Server reads message from the Client;
      • The Server sends “socket_server: Hello” to the Client;
      • The Client reads message from the Server;
      • The Client sends some text message (size 1024 with ‘\0’ symbol)  to the Server;
      • The Server reads text message from the Client and generates inverted message (src: “1234567890” -> inverted: “0987654321”);
      • The Server sends inverted message to the Client;
      • The Client reads message from the Server;
      • The Client send read message to the Server;
      • The Server reads text message from the Client and generates inverted message (src: “0987654321” -> inverted: “1234567890”);
      • The Server sends inverted message to the Client;
      • The Client reads message from the Server;
      • Last received message by the Client should be similar to the first message sent by Client to the Server;
    • UDP:
      • The Client connects to the TCP Server;
      • The Client sends “socket_client: Hello” to the Server;
      • The Server reads message from the Client;
      • The Server opens new UDP connection on new socket port;
      • The Server sends new UDP port number to the Client (using first connection);
      • The Client reads the UDP port number and closes first connection;
      • The Client creates new UDP connection, using received from Server port number;
      • The Client sends “socket_client: Hello” to the Server;
      • The Server reads message from the Client;
      • The Server sends “socket_server: Hello” to the Client;
      • … Then communication protocol (application level) is same as described in TCP section;
  • Simple TCP/UDP socket client (Microsoft Visual Studio C++, Windows platform), that implements previous described protocol;
  • Simple TCP/UDP socket client (Android Studio/Android SDK, Android platform), that implements previous described protocol;
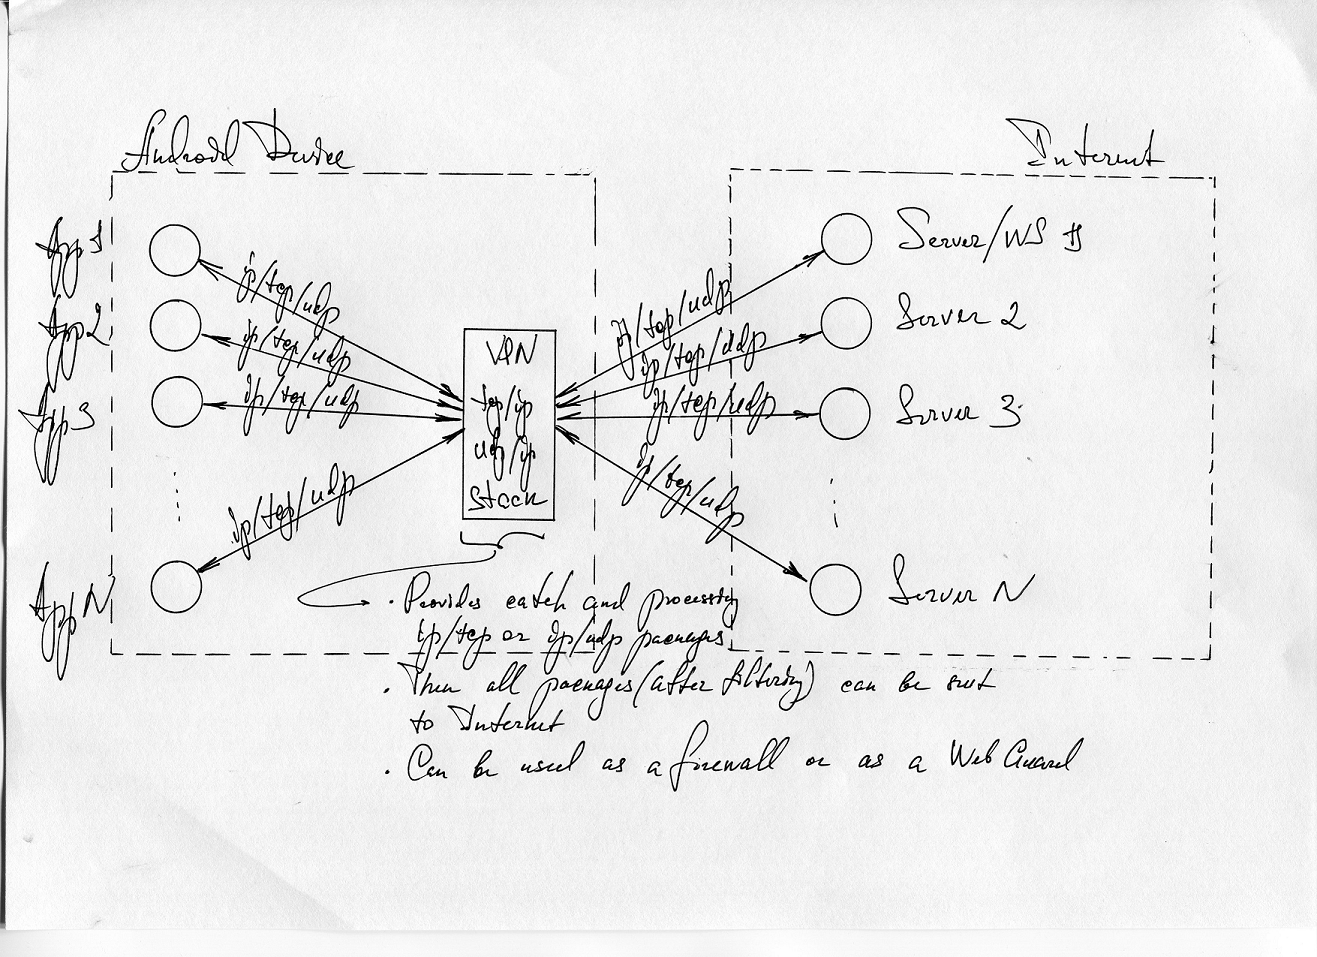
  • VPN Stack Application, that (Android Studio/Android SDK/Android NDK/C, Android platform), that is based on VpnService (Android platform) and implements intermediate IP/TCP/UDP stack (JNI/C/Sockets);
  • VPN Stack Application provides catching, monitoring and processing TCP/UDP/ICMP/IP packages; Then these packages are processed (via JNI) at the Native API level;
  • VPN Stack Application can catch packages from some defined application (if text edit “Filtered Package Name” is defined) or from all applications (if text edit “Filtered Package Name” is empty);
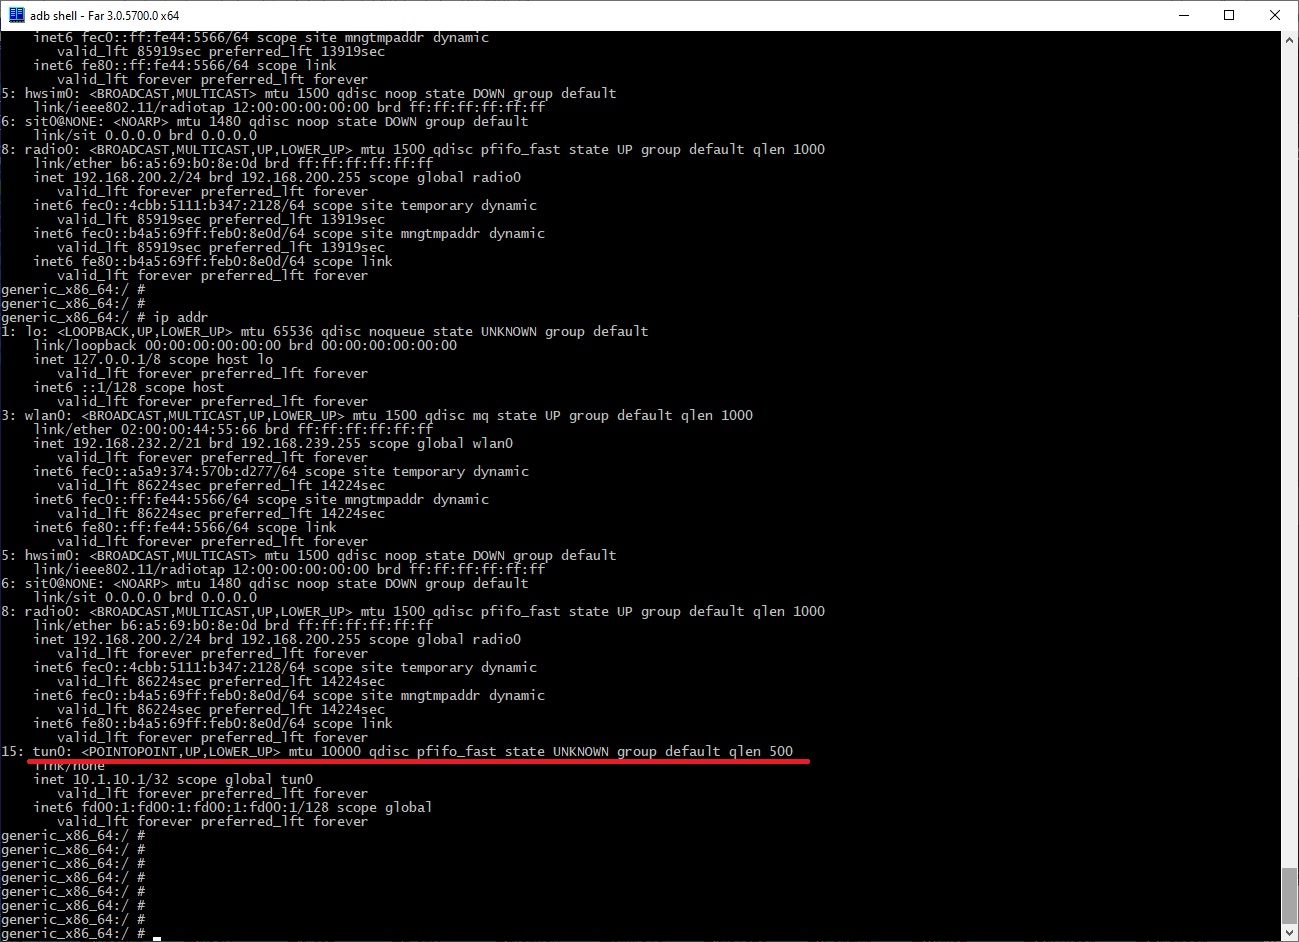
  • VPN Stack Application creates tun0 device (after launching), which is used for catching TCP/UDP/ICMP/IP packages;
  • VPN Stack Application reads packages, sent from Android application(s) from tun0 device, provides processing these packages and creates new or uses saved (sessions) TCP connections (if Android Application sends TCP package) or just uses sendto (if Android Application sends TCP package);
  • VPN Stack Application receives all packages from network, provides processing these packages and writes packages to tun0 device, then packages will be received by Android application(s);
  • VPN Stack Application doesn’t use Raw Sockets;
  • VPN Stack Application writes detailed log to Logcat and to the file
    /data/data/com.smansoft.vpn_stack/files/logs/vpn_stack.log;
  • Follow applications from this suite:
    • Simple TCP/UDP socket server (with multi-thread support) (Linux platform);
    • Simple TCP/UDP socket client (Microsoft Visual Studio C++, Windows platform);
    • Simple TCP/UDP socket client (Android Studio/Android SDK, Android platform) have been created and have been used for testing network connections and for testing the VPN Stack Application;

VPN Stack Application implements follow schema of network stack processing:
vpn_stack.png

Demo of the sm_vpn_stack_suite (Open-source Android VPN Stack Suite):
—————-

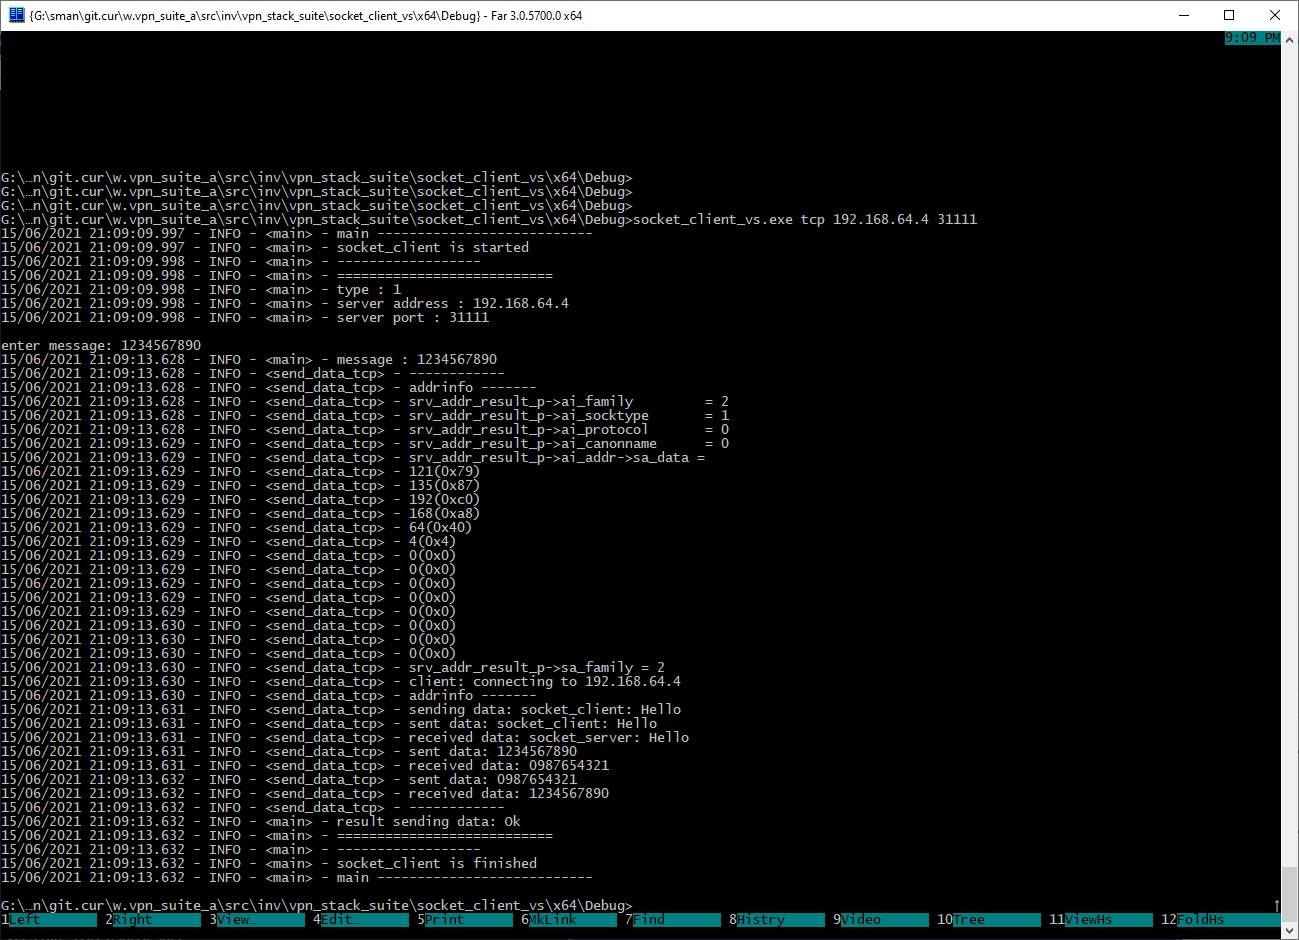
Here are results of the execution (log files and screenshots) of the socket_client_vs on Windows 10 x64.

socket_client_vs.1.log
socket_client_vs.2.log

socket_client_vs (Windows 10 x64)
socket_client_vs.1.jpg

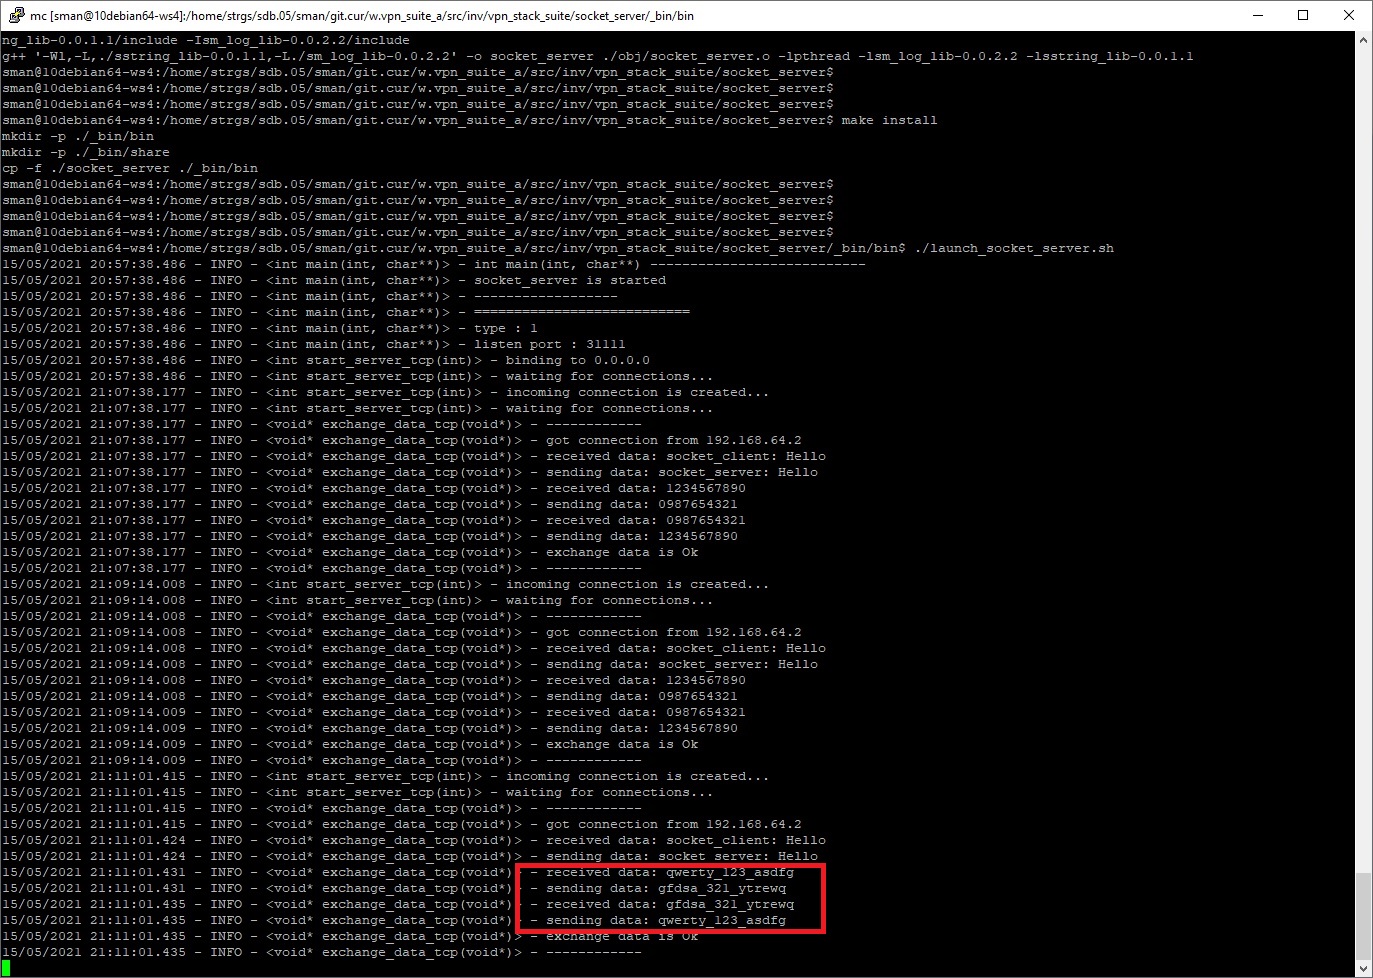
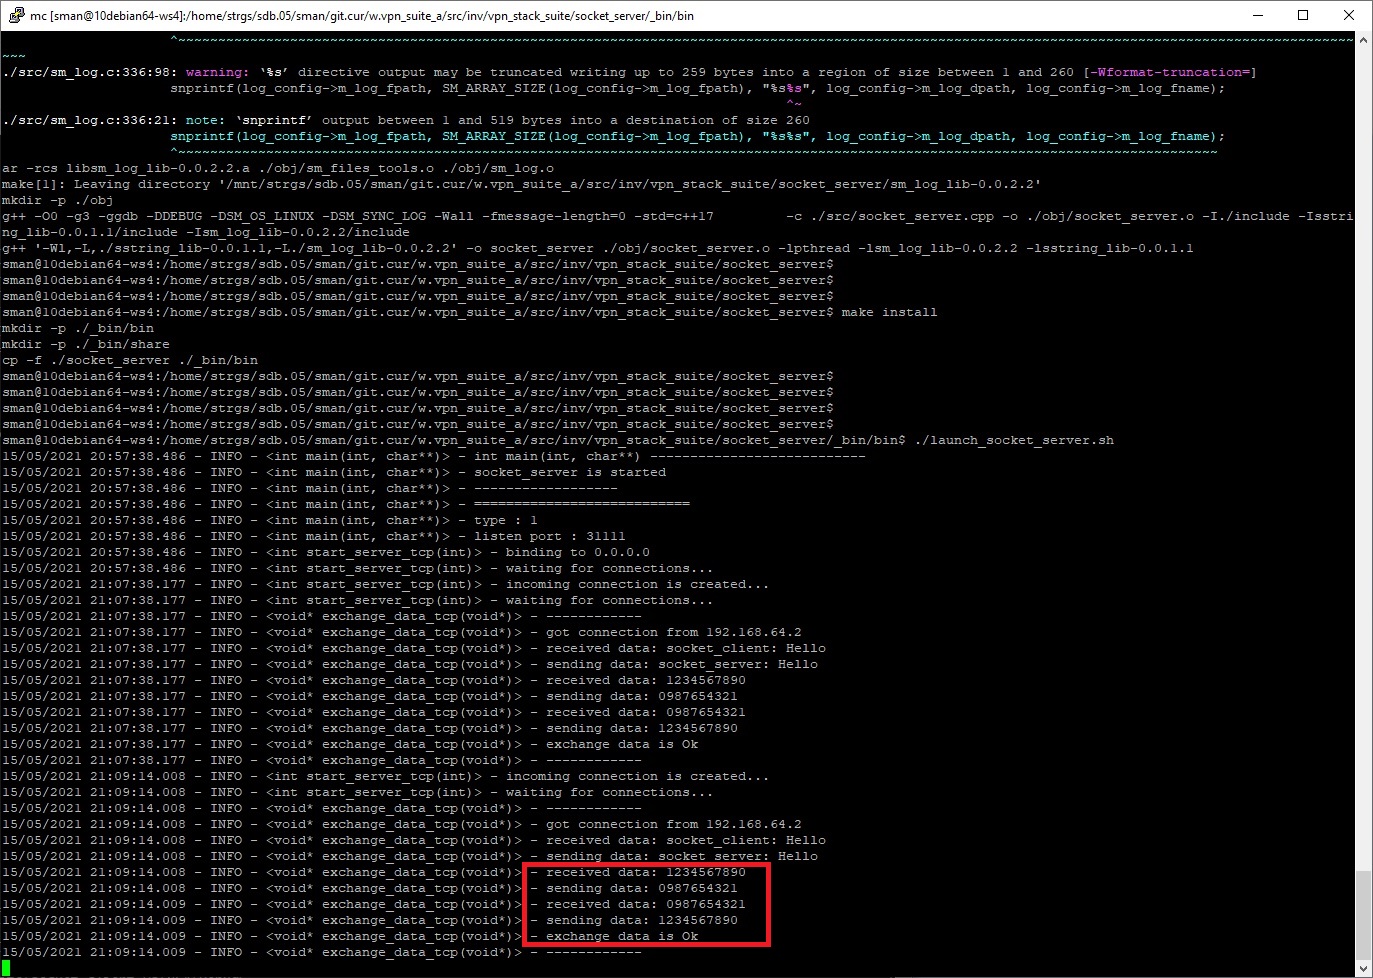
Here are results of the execution  (log files and screenshots) of the socket_server on Linux Debian 10 x64.

socket_server.1.log
socket_server.2.log

socket_server (Debian 10 x64)
socket_server.1.jpg
socket_server.2.jpg

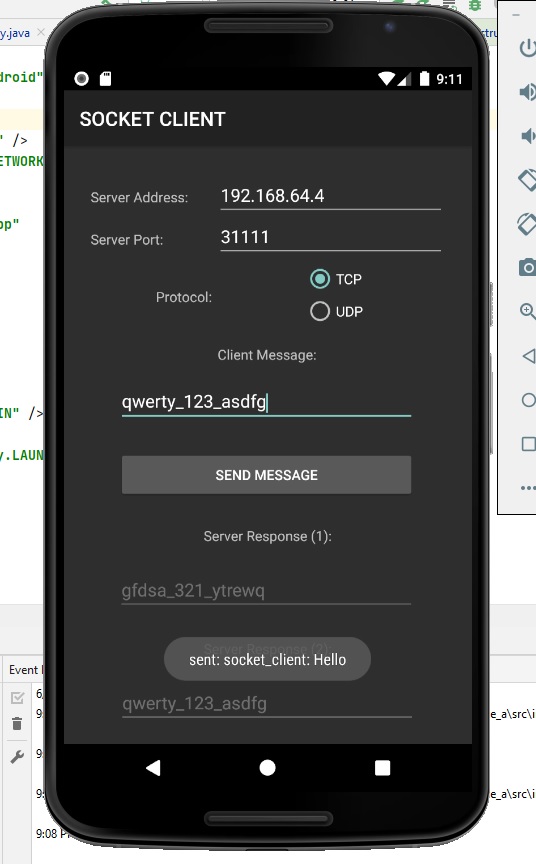
Here are results of the execution (screenshot) of the socket_client on Android 8.0 (API 26) x64.
socket_client.1.jpg

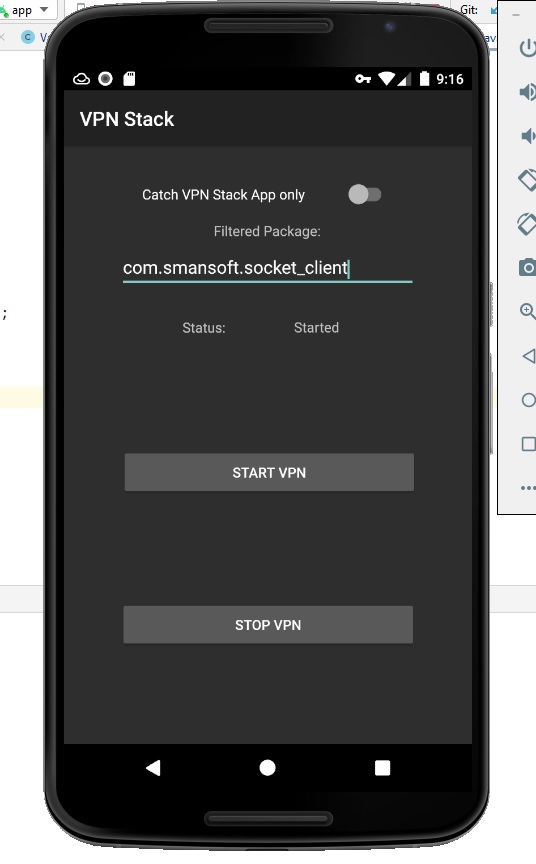
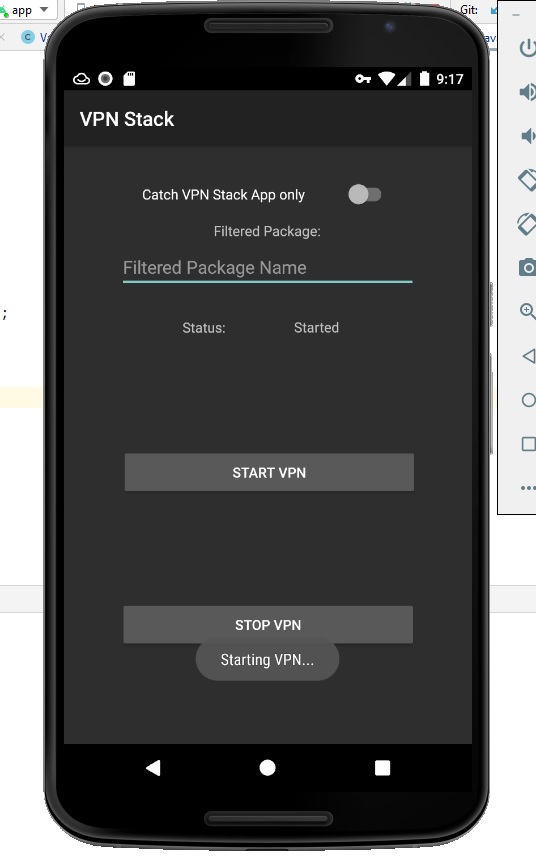
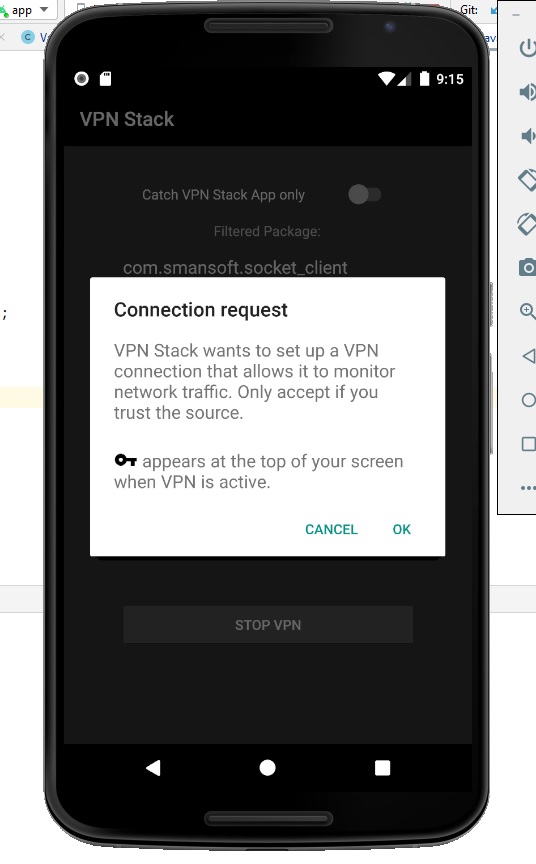
Here are results of the execution  (log files and screenshots) of the vpn_stack on Android 8.0 (API 26) x64.

vpn_stack.1.log
vpn_stack.2.log

socket_server (Debian 10 x64)
vpn_stack.1.jpg
vpn_stack.2.jpg
vpn_stack.3.jpg
vpn_stack.4.jpg

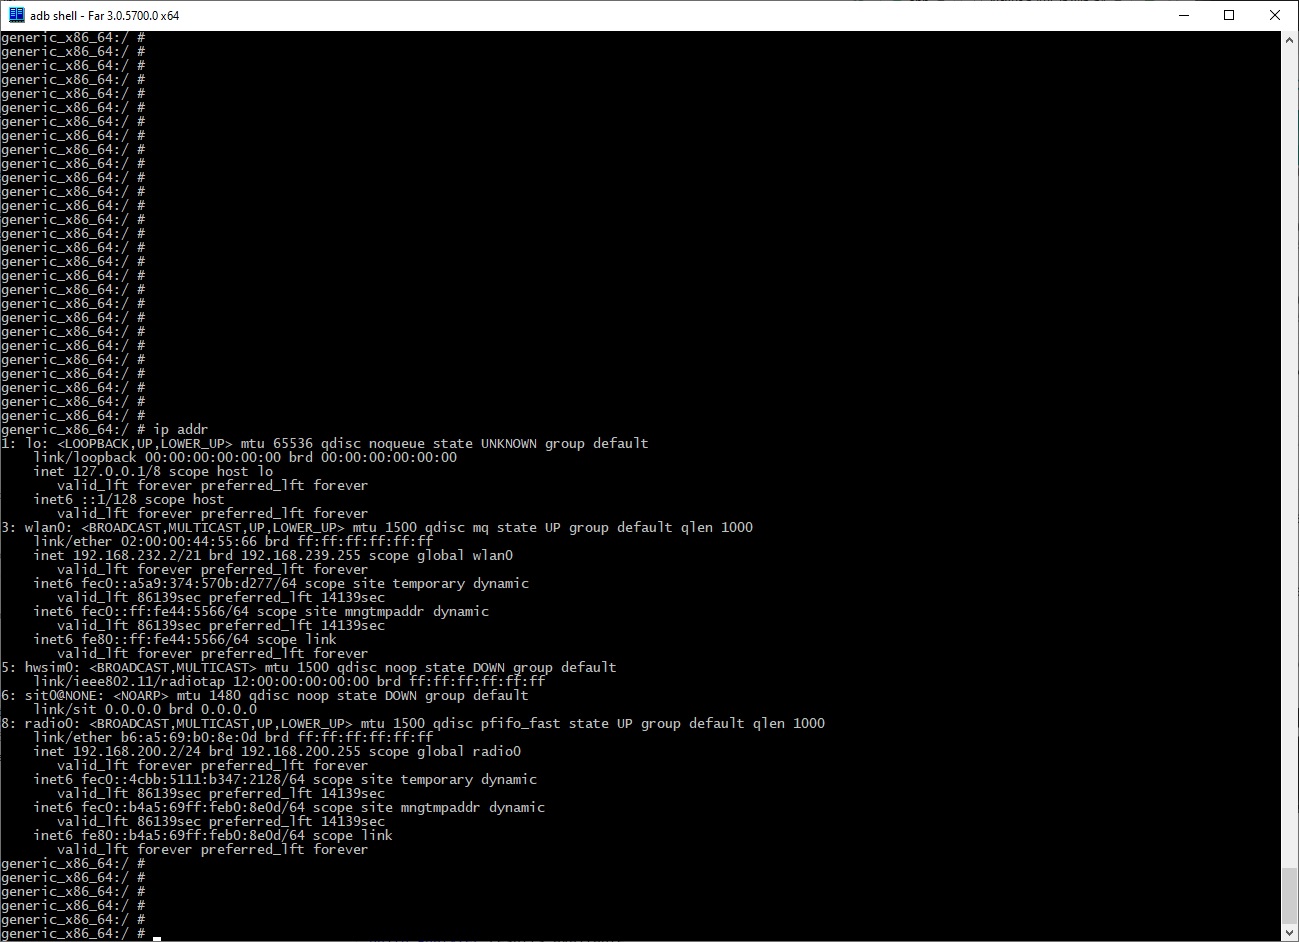
Here is list of network interfaces before launching the VPN Service.
ip_addr.1.jpg
Here is list of network interfaces after launching the VPN Service. Device tun0 (is used for catching the network traffic) has been added.
ip_addr.2.jpg

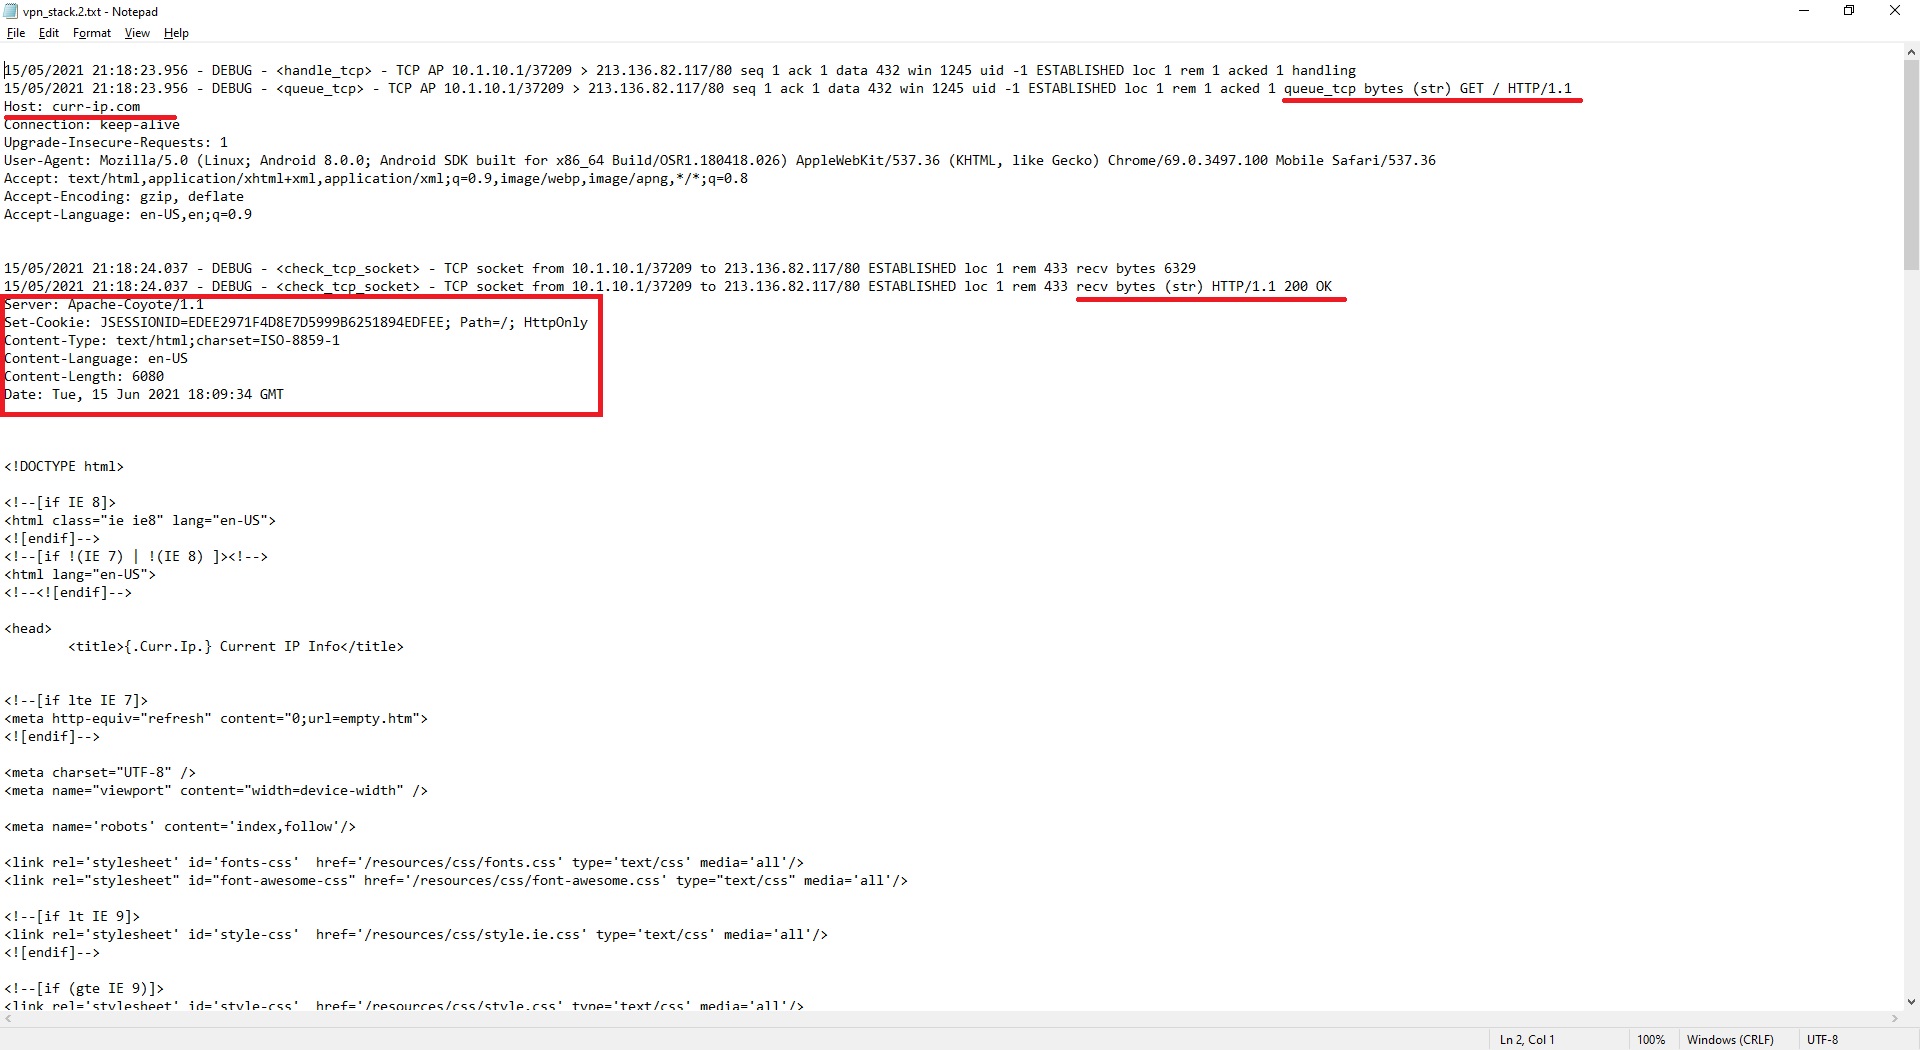
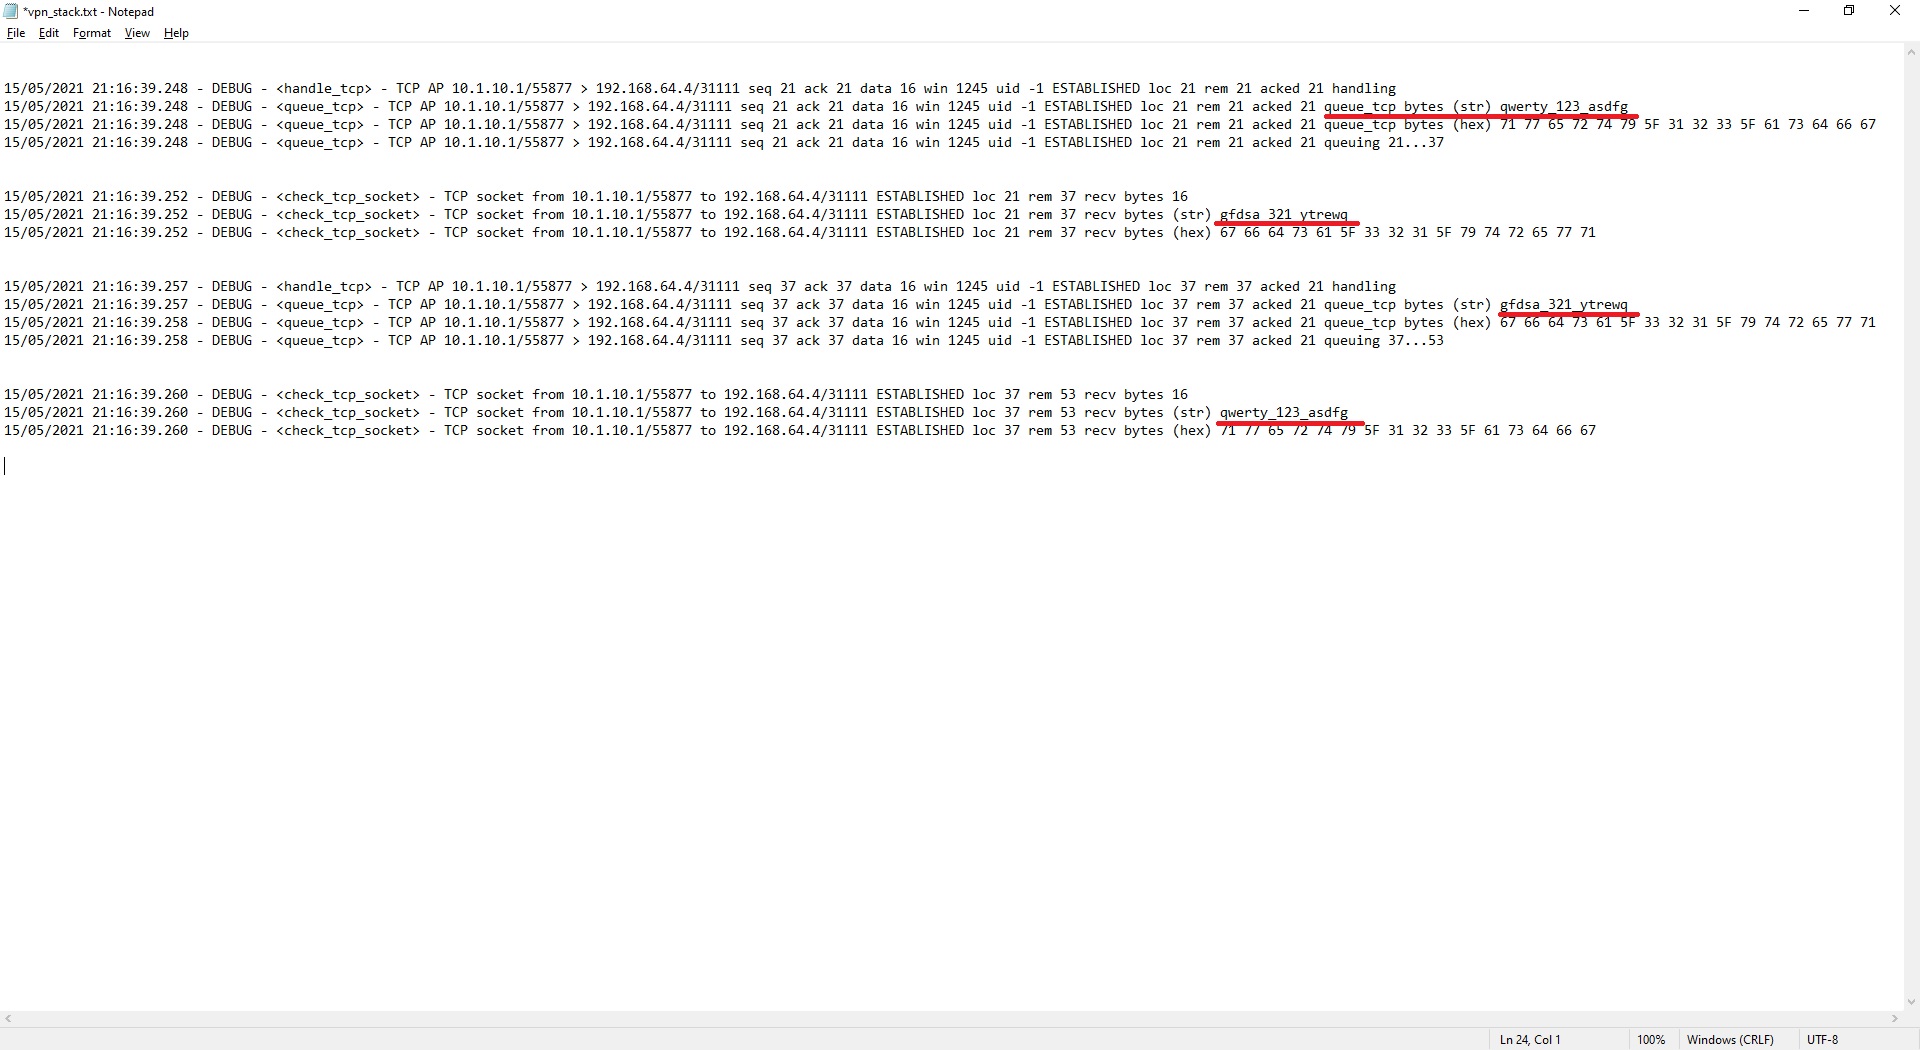
Here are selected results (from vpn_stack.1.log and vpn_stack.2.log):

vpn_stack.1.txt
vpn_stack.2.txt
vpn_stack.5.jpg
vpn_stack.6.jpg

sm_vpn_stack_suite (Android VPN Stack Suite) 0.0.1.1 ® Copyright © 2021 by SManSoft.